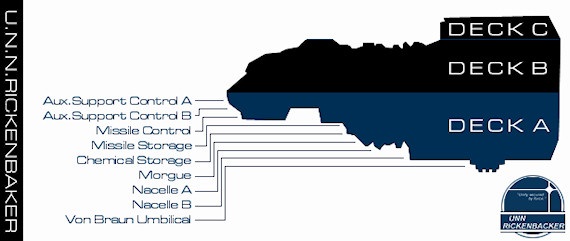
This guide is a walkthrough for a certain area aboard the Von Braun. You can see a map of the respective location and its points of interest, along with a map legend to identify each point. The points are in order and further explained in the “Walkthrough” section below.
Walkthrough
1 – Arrival & Upgrade Unit
First off, there’s pretty much no useful map aboard the Rickenbacker, so unfortunately this walkthrough will be text-only, but you should manage just fine in getting through the Rickenbacker – it’s not too complicated to navigate, and is significantly more linear than the Von Braun, so unless you forget something, there’s little backtracking required.
Immediately upon coming up the Grav Shaft, SHODAN will contact you and inform you that the Many have planted a number of Black Eggs (16 in total) that will give birth to a new generation of Annelid, one that will be impossible to defeat. Seems you have a new objective – to destroy all of the Black Eggs.
You’ll notice a 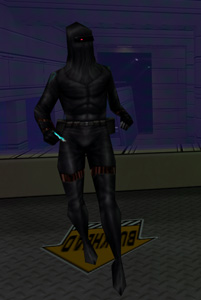 Cyborg Assassin camped atop a catwalk near the room’s exit. Destroy it, then scavange the room for some loot: an Audio Log near one of the support columns, Standard Bullets on the floor behind a pipe (again near the ladder) and some Standard Bullets and 50 Nanites on a corpse. You’ll also find a Psi Upgrade Unit near the ladder; use it if you need to.
For now, climb on up, but use caution: there’s two Turrets as you climb the ladder behind you. They won’t be able to attack you from below, so use that to your advantage and take them out before they can open fire.
2 – Black Egg 1
Upon climbing up the ladder, you’ll spot the first Black Egg in the corner of the room – it’s black, with glowing red/orange veins on it. Shoot or smash it, and SHODAN will congratulate you with 2 Cyber Modules, informing you that there’s 15 more to go. Lovely.
The corpse on the floor as you enter has a Crystal Shard on it, and some AP Bullets rest on the floor nearby. There’s also a Security Control Station here. When you’re done exploring, cimb up the ladder near the first Black Egg.
3 – Black Egg 2
Inside the Security Station, you’ll spot the second Black Egg out the window, on the upper level above the large cargo container. Conveniently, there’s some explosive crates, so shoot them to blow the Black Egg to kingdom come.
Search the body on the floor in here for 33 Nanites, Version 3 Repair Software, and some Rifled Slugs, then press the button near the window. The crane will rise and pick up the large crate, allowing two 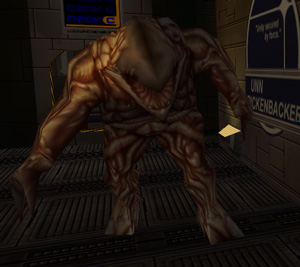 Rumblers and
 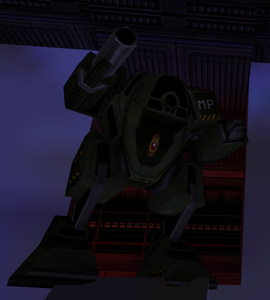 Military Bot to sneak under (one might not come out immediately). Fortunately, from your position they won’t be able to do much to you, so take pot shots with whatever weapons you might have. When you’ve finished, climb down the ladder again.
Before leaving the room, climb up the second ladder, to the platform where Black Egg 2 was sitting, and grab 65 Nanites from the floor. Through the force field, you’ll also spot Black Egg 3. Climb back down and head on through the new passage.
4 – Black Egg 3 & Upgrade Unit
Continuing forward, Captain Diego will contact you and tell you that he’s managed to purge the Many from his body, somehow. He needs to speak with you in person, for reasons he doesn’t disclose, so you’ll need to find him in Sick Bay. After he’s done, you’ll spot the third Black Egg on the ceiling just near the entrance to the room. Shoot it from below, taking care to also deal with the Cyborg Assassin lurking up there.
The corpse on the ground near the entrance has 52 Nanites, with some Disruption Grenades nearby, and you’ll also find a Surgical Unit Activation Key under some pipes on the right side of the room. There’s also a Weapon Upgrade Unit on the back wall if you need one. Navigate forward, following the right side of the wall, then the left.
5 – Secure Crate & Ramp Down
You’ll emerge in a small area with a ramp leading downstairs and a secure crate on the floor. Hack the crate for 47 Nanites and more  Disruption Grenades. You’ll likely come under attack by an Annelid Arachnid and a Cyborg Assassin in here, so plan accordingly. Ignore the ramp down for now and continue forward along the left side of the wall.
6 – Black Egg 4 & Hull Breach
In this room, SHODAN will again contact you. The floor of the ship has been ripped out, due to an overload in a mason acceleration coil, whatever that is. Despite the force field in place, you will die if you step on it. You’ll have to head to Engine Nacelle B for SHODAN to explain more. So many things to do! For now content yourself by shooting the Black Egg across the gap. Four down, twelve to go.
Check the body on the floor for a whole bunch of Anti-Personnel Bullets and an Anti-Toxin Hypo, and grab the Medical Kit from nearby. If you’ve got Psi Pull, there’s another Medical Kit on a pipe at the left-hand side of the breach. Head into the office nearby and grab 48 Nanites and a Psi Hypo from the desk, as well as an Audio Log on the windowsill.
Next, press the switch in the office to extend a small bridge across the breach. Unfortunately it won’t go the whole way and is too far to jump, so you’ll need to find an alternate way around. Time to backtrack to where you found that ramp down.
7 – Black Egg 5 & Service Tunnels
Take the ramp down and you’ll find this Black Egg in plain sight. Destroy it and head into the red-lit service tunenls. There’s only one way to go, so follow the way forward, up a steep incline, until you get to an intersection near some steam. Nab the Maintenance Tool on the floor to the right side, then follow the path right (there’s no reason to go left, as it simply loops back on one of the previous rooms). You’ll emerge on the other side of the hull breach; press the button nearby to extend another bridge, then grab the Audio Log on the ledge where you came in.
Out the window, you’ll spot a corpse with a 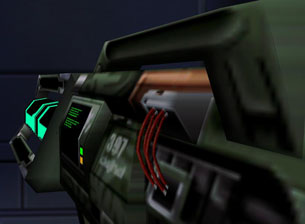 Fusion Cannon next to it; if you want, you can jump down (save before trying) and pick it up, or alternately you can use Psi Pull. If you make the jump, you can also grab some
  Heavy Combat Armor from the corpse. Either way, hop down to the middle bridge, then to the one you just extended and head inside.
8 – Rickenbacker Access Card
Inside this small room, you’ll find a 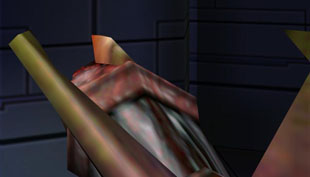 Viral Proliferator under the computer terminal desk, and the corpse holds two Anti-Radiation Hypos, some Fragmentation Grenades, and a Rickenbacker Access Card, which you’ll need later on. Head back out and jump to the middle bridge section, following it inside the next room.
9 – Pod 2 Access
One of the corpses in here has 41 Nanites and a Psi Hypo on it, while the other’s empty. Take the ladder on the right side up, and hop across the platforms to find 48 Nanites across a couple of jumps – you’ll spot some of the areas you’ve already visited from above. Climb back down, then follow the arrows on the floor, and take the next set of ladders up the shaft.
10 – Black Egg 6 & Secure Door
At the top of the ladder, you’ll find a Cyborg Assassin guarding the fifth Black Egg. Destroy the Assassin, then the Black Egg. With 10 eggs left, SHODAN will give you 6 Cyber Modules for your efforts. The corpse next to it has an Audio Log and more Disruption Grenades, and there’s also some Anti-Personnel Bullets next to it. In the room with the flickerling lights (stay away from the sparks, or you’ll take minor damage), there’s 34 Nanites on one of the corpses, and a switch on the wall; press it to open the secure door, or alternately use the card reader nearby.
Inside the corridor, you’ll come under attack by two Cyborg Midwife and an  Invisible Annelid Arachnid – they’re not any more dangeorus, but are a little harder to see. Dispose of the threats and then walk left, following the arrow to Nacelle A.
11 – Chemical Storeroom
Inside the room, you’ll find a Chemical Manifest and 24 Nanites on the shelves, as well as a Small and Large Beaker if you use any Worm-powered guns. When you’re done, leave through the damaged wall section to the right, past the ramp down, and into the Morgue.
12 – Morgue & Black Eggs 7 & 8
A Rumbler awaits you in this room. Use whatever means you have to take it down. There’s a Black Egg sitting on the upper walkway, and another is visible past the railing on the opposite end of the room. Destroy both of them, then loot 36 and 50 Nanites from the floor and in one of the body bags. Be careful, as the Black Egg in the lower room is guarded by two ceiling-mounted 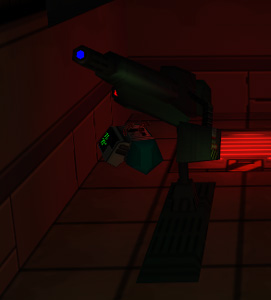 Rickenbacker Turrets, which do a bit more damage than standard Laser Turrets.
Down in that room (which you can reach both by hopping the railing or by taking the ramp down), grab the Audio Log and Psi Hypo from the floor, then proceed back to the Chemical Storeroom and exit, following the way towards Nacelle B. You’ll soon come across a corpse with some Anti-Personnel Bullets, plus 45 Nanites and a Viral Proliferator on the floor. Beware of the Swarm Pod on the wall around the bend to the right, as well as the 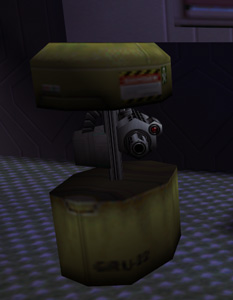 Missile Turret at the end of the hall; destroy it and proceed.
13 – Black Egg 9
Past the Missile Turret, you’ll find another Black Egg being watched by a Security Camera and a  Rickenbacker Turret. Destroy them all, and grab the French-Epstein Device, Maintenance Tool, and AP Bullets from the floor, then head back the way you came, following the markers to Nacelle B.
14 – Nacelle B Access & Black Egg 10
As you come into the room (characterised by the light changing from red to grey), you’ll come under attack by a ceiling-mounted Laser Turret on the left. Destroy it as usual, then search the red and white crate for some AP Bullets, and climb down the ladder.
Halfway down, you’ll find the tenth Black Egg sitting on a ledge. Beware of the Cyborg Assassin below, who may attack you as you head down the ladder.
15 – Bio-Reconstruction Device & Replicator
Finally, a Bio-Reconstruction Device. Use the valued machine, then search behind the pipes near the Replicator for 52 Nanites. There’s a Small Beaker in the trash can, along with several Worms on the floor, so catch them or eat them (with a WormBlood Implant). The secure crate has a  Fusion Cannon inside, along with 20 Prisms and a WormBlood Impant if you don’t have one already. Last, you can use the Replicator for Psi Hypos, Medical Kits, Chips, and Prisms, and it can be hacked for… more Prisms. Eh, thanks.
When you’re done resting and recuperating, take the hallway out of the room – it’s just to the right of the Replicator. Mind the Turret as you exit, then take a 180 and head into Nacelle B.
16 – Nacelle B & Black Eggs 11 & 12
You’ll find two Black Eggs in Nacelle B almost immediately upon entering. Destroy both, and SHODAN will send you 8 Cyber Modules for your continued efforts. Meanwhile, the Many try to persuade you to their side. Use your Rickenbacker Access Card on the door and proceed inside.
17 – Nacelle B Tunnels & Black Egg 13
Climb down the pipes and you’ll be attacked by a Rickenbacker Turret down the corridor to the right – shoot it from a distance, then follow the path forward. There aren’t any items in here, which is just as well as it’s quite dark. Before reaching the destroyed Turret, turn left and you’ll find a passage to a second tunnel. Turn right and climb up the ladder to the upper level.
Destroy a Missle Turret to the left as you come up the ladder, then take the hallway right, towards the steam leaking from the pipes. Climb up once again and you’ll be shot full of holes by another Turret to the right, through a steam cloud. Dispose of it, and you’ll notice a Black Egg behind it – shoot it, and you’ll be one step closer to finishing up in here. Turn around and crawl through a small hole in the wall to yet another tunnel. Follow it and climb down the ladder.
18 – Gravitronic Generator Control
Another Missile Turret waits you as you climb down the ladder… nope, I’m not tired of turrets yet, really. Fortunately, your goal here awaits at the end of this tunnel: the Gravitronic Generator Control. SHODAN asks you to flip the switch on it; doing so will reverse the gravity in Pod 2, preventing you from certain death, and of course reward you with 20 Cyber Modules.
With switch successfully flipped, turn your way around and hop down to the Nacelle B entrance. Time to head to Pod 2, so backtrack your way there (near the Chemical Storeroom earlier) and follow the signs.
19 – Security Station
Head through this next door with caution. There’s two Rickenbacker Turrets and a Missile Turret at the end of the room, and they’re none too happy with you being there. Use some EMP or Armor-Piercing weapons to dispose of them from afar, then grab the ICE-Pick from the floor, and the Version 3 Hacking Software and Audio Log from the corpse. There’s also a Security Control Station in here if you want to give yourself some quiet time from all the defenses. Continue past the Turrets to the next room.
20 – Medical Bay
Consider using an Activation Key with the Surgical Unit here, as healing is a bit hard to come by on the Rickenbacker. In the room across, you’ll find a Portable Battery on a gurney, and an Audio Log under the desk. Follow the trail of shotgun shells into the next room. When you see the Pod 2 sign on the floor, rather than going through the door ahead, turn around and take a left into the green-lit hallway; weave through the pipes and a Medical Kit will be yours at the end. Turn back and head through the door, following the way towards Pod 2.
21 – Black Egg 14
You’ll immediately spot this Black Egg mounted on the wall, just to the left as you exit the door. Smash it to bits, and proceed down the ramp. You’ll hear the telltale chatter of a  Military Bot, so prepare to deal with one. For now, search the floor ahead for an Audio Log, and the corpse for an Anti-Radiation Hypo, then make your way up the ladder, across the catwalks, and up a second ladder.
22 – Open Area & Black Egg 15
As you come up the ladder, a Military Bot will attempt to ambush you from the small cul-de-sac nearby. Sneak past or destroy it, then continue into the large room ahead. You’ll see a 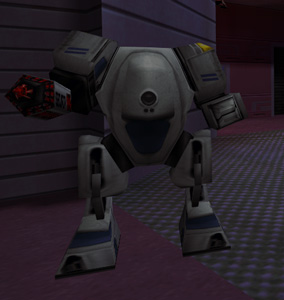 Security Bot and Protocol Droid on patrol; they’re best dealt with from a distance. The fifteenth Black Egg lies in the centre of the room, so destroy it and receive another 8 Cyber Modules for your handiwork.
Up the ladder, there’s a corpse surrounded by some Annelid gunk; you’ll find a Psi Hypo on the floor nearby, but several Annelid Grubs will spring forth and attack when you get near. There’s also a few scattered Protocol Droid shipping crates around the room, but there’s no real need to destroy them, as you won’t be ambushed.
Last, the Replicator in the corner of this room has Vodka, Prisms, Anti-Toxin Hypos, and  ExperTech(TM) Implants for you, and can be hacked for Disruption Grenades. Handy!
23 – Pod 2 Access & Missile Puzzle
You will, however, be ambushed by a Protocol Droid as you enter the next room, so be careful as you come in. There’s also two Missile Turrets on the back wall, so expect to die if you run in guns blazing. You’ll notice this room has four missiles on the left and right sides, and a control console in the middle. Sounds like… a puzzle!
The goal here is to position the missiles around the room in order to climb up to the walkway above. Sounds complicated, but it’s really not that difficult – position two of the missiles so at they’re at the top position, and another two to form a “staircase” leading up to the walkway. The quickest solution is to press the first switch twice, second switch twice, third switch once, and fourth switch twice. As you cross the catwalk, look across to the far side of the room and use your Kinetic Redirection to snag 34 Nanites from the other end. Clamber across the missiles, and jump to the ladder for 20 Cyber Modules.
At the top, you’ll be attacked by a Cyborg Assassin, but it should be little challenge by now. You may find the Security Control Station nearby useful, as well. Through the door, and up the ladder to the left, there’s two more Turrets to dispose of, one at each end of the room. The security crate in the middle of the room contains two Maintenance Tools, a Small Beaker, a Psi Hypo, a Portable Battery, and 20 Prisms. Not bad!
Clamber over the railings, taking care to avoid the Security Camera in the right-hand corner of the room. Before proceeding into the red-lit corridor, wade into the pool of water to the left for a Psi Hypo. Continue along the hallway, and stop when you see the Security Control Panel – there’s 5 Cyber Modules underneath the floor grating.
24 – Missile Bay & Hybrid Ambush
In the next room, you’ll be treated to an attack by some painfully outmatched Hybrids. Even the three of them rushing you should be no challenge. Loot their rotting corpses, then head inside the door to reach the firing mechanism for the ship’s missiles. Press the button and launch them out into space, which will clear the path ahead for you. Exit, and take the door to the right side of the room, into another red corridor (where the missiles were previously blocking the way). As you exit the corridor, you’ll be spotted by a Security Camera, so smash it quickly.
25 – Ladder & Hidden Room
As you pass the Security Camera, you’ll spot a ladder to climb up; do so, but as you pass the pipe, jump to it and follow it to the window. Smash your way inside, and you’ll be able to grab another 5 Cyber Modules from the floor. The door inside is broken, so turn around and finish ascending the ladder.
At the top, grab the Medical Kit from behind the four pipes, then circle back and sneak into the next room. Two Turrets await you, but they’re of relatively little threat. You’ll find a Psi Hypo on the floor next to them. Beyond the door, a Rumbler awaits you, so terminate it with extreme prejudice.
26 – Exit to Rickenbacker Pod 2, Black Egg 16, & Upgrade Units
Finally, the end to the first Rickenbacker Pod! In this room you’ll find Upgrade Units for Stats and Tech, as well as the final Black Egg to the left of the exit; reducing it to goop will draw some “congratulations” from SHODAN, and a reward of 16 Cyber Modules. Last, there’s a secure crate with Rifled Slugs, a Psi Hypo and some Fragmentation Grenades.
You’re perilously close to the endgame, so now’s a good time to spend those Cyber Modules you’re no doubt swimming in… unless you’re playing on Impossible, in which case, good luck! Proceed through the door ahead to enter Rickenbacker Pod 2.
