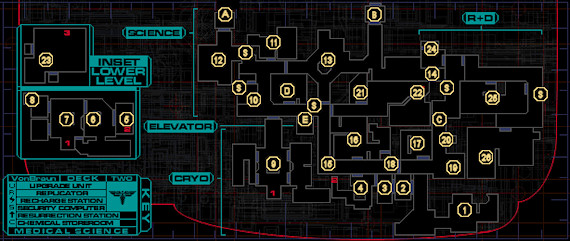
This guide is a walkthrough for a certain area aboard the Von Braun. You can see a map of the respective location and its points of interest, along with a map legend to identify each point. The points are in order and further explained in the “Walkthrough” section below.
Walkthrough
1 – Awakening
You’ll find yourself defrosted from your cryogenic sleep; unfortunately, due to an error in your memory reconstruction, you’ll be left with amnesia, but at least your skills are left intact. You’ll be greeted in the cutscene by one Dr. Janice Polito, a staff member aboard the Von Braun. She claims that, a few weeks ago, you volunteered to be implanted with some experimental cybernetics, which will allow you to much more rapidly upgrade your abilities.
As soon as you step forward, you’ll be told to take cover, and a radar dish from the other side of the ship will smash into the window; fortunately, forcefields will block off the damage. Search the corpse in the small room nearby and you’ll find a 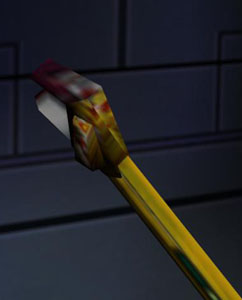 Wrench on it; this is your first weapon, and one you will quickly grow to rely on throughout most of the game.
To proceed, use your wrench to smash the fallen wreckage blocking the ladder, then climb up.
2 – Locked Door
Rushing to avoid being sucked into space (don’t worry, you’re not really on a timer), you’ll enter this room and find yourself at a locked door. The key can be found on the floor next to the table; pick it up and use it on the access card slot next to the door to proceed.
3 – Keycode Door
In the next room, you’ll find another locked door. This one, however, requires a keycode to open. So where’s the code? Search the body on the ground to find an Audio Log, and give it a listen (U key by default) to hear the code – it’s 45100. Enter it on the keypad and continue. Alternately, you can hack the panel if you’ve got the necessary skill to do so.
4 – Vent
In this next room, you’ll see a grisly scene of a crew member being chased by some sort of mutated human with a shotgun, more accurately, a 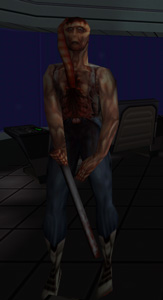 Hybrid, though he won’t attack. To continue, crouch down and crawl through the vent. The steam inside the vent won’t hurt you. When you reach the end, you’ll fall down onto the lower floor.
5 – Powered Door
In this room, you’ll find a locked door that requires a power source to open. Conveniently, there’s just such a thing lying on the floor, along with a Recharging Station. Pick up the  Dead Power Cell, use the Recharging Station, then open your inventory to click and drag the fully-charged Power Cell to its slot. The door will open up for you. There’s also a Wrench in here if you need it, though you shouldn’t unless you threw your old one away for some reason.
6 – Cryo Lower Level & Upgrade Stations
The lower level of the MedSci sector you’ll find yourself in is free for you to explore right now, and you’ll find some minor loot scattered around. Dr. Polito will give you 4 Cyber Modules as you enter the area, which you can use at the nearby Upgrade Stations (7). When you’re done, take the elevator in the corner of the room up.
As far as loot goes, there’s a shipping container with 20  Nanites just as you enter, a corpse in the left-hand room with 10 Nanites, a corpse with 4 Cyber Modules near the Upgrade Stations (7), a shipping container with 5 Nanites and an Audio Log on top of it, and a corpse with a
  Medical Hypo.
7 – Upgrade Stations
You’ll be given 4 Cyber Modules by Dr. Polito to purchase your first slew of upgrades at the stations around this room. Pick whatever you like, though in the early stages you’ll probably want to focus on skills that improve your melee damage, research and hacking abilities, as they come in quite handy. Be sure to check the corpse just nearby for 4 extra Cyber Modules.
8 – Locked Storage Room
There’s a keypad-locked storage room here. For those who can’t hack it, the code is 00000. Inside you’ll find two  Speed Boosters and a very useful
  BrawnBoost(TM) Implant.
9 – Cryo Upper Level
Up here, you’ll find a few more rooms to explore and, more importantly, the way out. When you approach it, you’ll literally see a ghost, who speaks about how he can’t find his card to exit. Fortunately, you can find it – it’s near a corpse in one of the adjoining rooms, on the floor. Pick it up and you’ll be able to leave, and Dr. Polito will give you 4 Cyber Modules to spend. Outside the door, you’ll have free reign, more or less, of the MedSci sector, so get to it!
Loot-wise, there’s a corpse with a 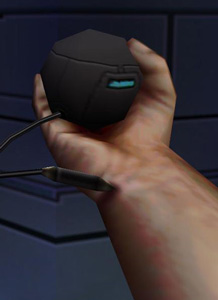 Psi-Amp in one room, and in the other room, smash the glass case for some
  Rifled Slugs, and check the nearby corpse for 20 Nanites. There’s another 20 Nanites just near the door leaving the area.
10 – Security Station
You’ll be attacked by a couple of Hybrids when approaching the Security Station. There’s a hackable security crate inside here containing some  Standard Bullets and 21 Nanites. In the adjoining room, there’s a couple of minor food items, and an Audio Log if you search the desk.
11 – Morgue/Furance & Quantum Bio-Reconstruction Device
In here, you’ll find one of the most useful objects in the game – a Quantum Bio-Reconstruction Device. These handy stations will revive you upon death for a modest cost in Nanites, for the most part making death less permanent, but also rather costly, so you may not want to rely on them too much as well. For the device to actually work, though, you’ll need to provide an entaglement sample by using the panel next to it; you’ll know it’s online when you see a spinning holographic image of your body above the station.
Beyond that, there’s an Audio Log on the floor in the morgue/furance room, and you’ll find a  Psi Hypo and
  Medical Hypo on two of the bodies.
12 – Lobby & Dead Power Cell
In this room, you’ll find the door leading to the Medical side of MedSci, and the Crew Quarters. Note that there’s a 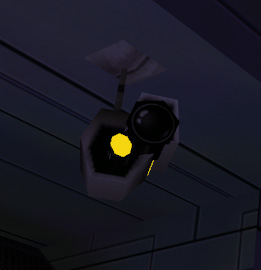 Security Camera in here – destroy it to avoid setting off the alarm. Unfortunately, the door is locked, but you’ll notice there’s a slot for a Power Cell next to it. You know the drill by now – grab the Dead Power Cell and search for a charger. Unfortunately, the Recharging Station you used earlier is inaccessible, so you’ll need to hoof it over to (23) to get the Power Cell, well, powered up.
When you return and insert the charged Power Cell, the door to Medical and Crew Quarters will open, and you’ll be given 4 Cyber Modules by Polito.
Scattered about the room, you’ll find an Audio Log, two  Anti-Radiation Hypos (one on the upper ledge near the desk, one on the desk itself), and, on the body, an
  MFD Game Player, and a copy of Swinekeeper (to use the game, right-click it in your inventory and it’ll be installed), for those of you who really feel the need to play Minesweeper within another game.
13 – Xerxes & Replicator
In this room you’ll come face-to-face, so to speak, with Xerxes, the artificial intelligence controlling the computing systems of the Von Braun. You’ll deal with him later in the game, but for now, at least you know where those radio announcements are coming from. As you approach the Replicator, you’ll see another ghost as well.
There’s a few things to find in here: 20 Nanites buried between some storage boxes, and a corpse carrying your first real weapon, a 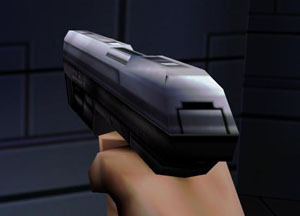 Pistol (in good condition to boot). The Replicator is selling Chips, Standard Bullets, and Medical Hypos; you can also hack it if you have a level 3 skill to buy Maintenance Tools instead. In the hallway leading out you’ll also find a bottle of
  Vodka and an Audio Log on the bench.
14 – Security Camera & Turret
As you approach, you’ll come across a Security Camera; smash it to avoid setting off the alarm. Just beyond, you’ll likely come under attack by a 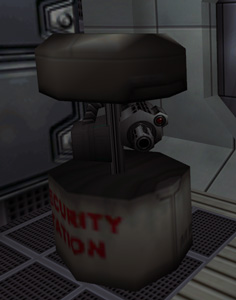 Turret as you follow the hall down the slope. The turret takes a lot of bullets to destroy, but fortunately you’ll find a box of
  AP Bullets tucked into a crevice in the wall. You can use them with your new-found Pistol to take out the Turret if you like, or save your ammo and move on, as there’s nothing much at the end of the hallway save for some more Standard Bullets.
15 – Security Camera
You’ll find this one just behind the pillar in the middle of the hall – shoot it from a distance before it can spot you.
16 – Lab
As you enter, the lights will go out and you’ll be attacked by a Hybrid and a 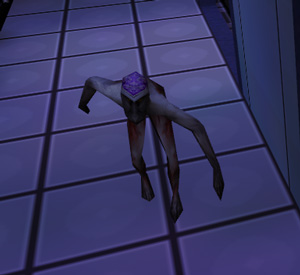 Monkey. Be warned, as these chimps are dangerous! They attack both in melee, and by firing Cryokinesis blasts at you. Unlike Hybrids, they’re easiest taken out from a distance, as their small size makes them hard to hit, but you may want to save your ammo and use your Wrench anyway. Once they’re dealt with, look through the floor grate in the maintenance room to see the Recharging Station you’re looking for – you’ll have to find another way. Note that you can smash the windows in here to reach the Computer Room at (17).
Inside this room you’ll find more booty – three  Anti-Toxin Hypos in one of the desks and an Audio Log in another. There’s a hackable storage crate in the adjoining room containing an Anti-Radiation Hypo, a Medical Hypo, and 11 Nanites.
17 – Computer Room
There’s very little here save for a Medical Hypo under some wreckage – smash it with your Wrench to claim it. In the hallway just outside this room, there’s another Medical Hypo in a body bag. You’ll also be able to reach the Lab at (16) by breaking the window.
18 – Corpse
Search this corpse for a copy of  Version 1 Research Software, which will speed up your researching of enemy physiology.
19 – Lounge
Down the ladder, you’ll find a Hybrid, as well as some explosive containers that you can shoot to take him out easily (obviously, don’t stand too close to them). There’s a hackable storage crate here containing 44 Nanites, and a trash can contains another 20. Through the window, you’ll see part of the R&D sector, which you’ll visit later.
20 – Replicator
Another Replicator here for you, selling Chips, Standard Bullets, Anti-Toxin Hypos and Anti-Radiation Hypos. Hacking it will replace the Chips with somewhat more useful Psi Hypos. Lastly, check the stretcher across from the Replicator for an Audio Log.
21 – Chemical Storeroom
You’ll likely become familiar with these rooms across the Von Braun, as they contain the chemicals needed to research many of the hostile creatures you’ll face. To view a full listing of the chemicals here, in addition to other information related to researching, please visit our Research page.
Before you go, check the corpse and the storage containers for two Medical Hypos.
22 – Ladder Down
This ladder to the Recharging Station is guarded by a Hybrid. Dispose of him however you wish, check the corpse for some AP Bullets, and then head down to the Pump Station.
23 – Pump Station & Recharging Station
Don’t be too quick to approach the Recharging Station here – as you do, the two doors near it will open up to reveal Turrets. The explosive barrels won’t actually do any damage to the Turrets when shot, so they’re best avoided. Instead, duck behind the nearby pillar and lean back and forth from around it to take pot shots, preferably with AP Bullets. When the Turrets are destroyed, use the Recharging Station to charge up the Power Cell, then return the Power Cell back to the door at (12).
As far as loot goes, you’ll find a Psi Hypo on top of some crates (climb them or jump from the catwalks above), some Vodka, and, more importantly, 2 Cyber Modules and a Medical Hypo on the corpse.
24 – Maintenance Closet
There’s a Security Camera in the hallway leading here. Nothing of note inside, save for a poor soul who ended his own life. The Pistol he used is in terrible condition, but you can still use it if you’re desperate.
25 – R&D Lab & Recharging Station
In the hallway, you’ll see another ghostly image before your eyes; search the corpse at the end of the hall for a Speed Booster and some Standard Bullets. Inside the R&D Lab, there’s some Standard Bullets in a desk, a Maintenance Tool on a corpse, some  Anti-Personnel Shells in a crate, AP Bullets and an Audio Log on the counter, and a
 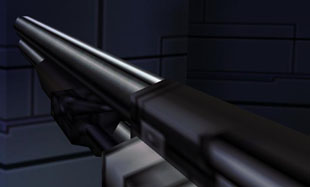 Shotgun on the corpse on the upper level.
Use the Recharging Station in here if you need to, and move on to find Dr. Watts.
26 – Lab of Dr. James Watts & Surgical Unit
On your approach, be aware of the Security Camera just outside the door, and grab the Standard Bullets from the ledge in the hallway. Inside, you’ll find Dr. Watts, who will impart some dying words to you about “they” wanting to use you as a “host.” After he’s dead, search his body for two Audio Logs, and Dr. Polito will send you 6 Cyber Modules. One of the Audio Logs contains the code to the maintenance hatch leading to Engineering, 12451.
You’ll be attacked by two Hybrids on the upper level as you turn towards the elevator, but there’s a Surgical Unit right near Watts, so use it if necessary. There’s only minor loot to find: some Standard Bullets on the corpse in the corner, along with a terrible-quality Pistol, and a Medical Hypo on the floor.
A – Medical & Crew Quarters
This door leads to Medical & Crew Quarters. You’ll need to grab the Power Cell from the Lobby at (21) and charge it at (23) to open the way forward.
B – Crew Quarters
C – Research & Development
You’ll need to get the keycard from Medical before you can open this door. Once you do, you’ll receive 4 Cyber Modules from Dr. Polito.
D – Engineering Maintenance Hatch
The ladder in this room leads down to Deck 1, Engineering. Though you can technically use the code gained at (26) to open the door right from the beginning of the game, you’ll be missing out on some Cyber Modules and exploration, so it’s recommended to play through as intended. That said, if you really want it, the code is 12451.
When you return after retrieving the code from Dr. Watts (26), a 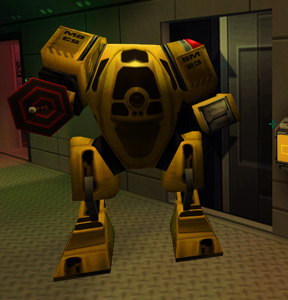 Maintenance Bot will attack you! This hulking robot isn’t as tough as it looks – run away from it and fire using your best weaponry, and you should have it disposed of eventually. Descend down the hatch to begin the next section of the game.
E – Elevator
Of course, getting to Deck 4 couldn’t be that easy. The main power is offline and you’re going to need to restore it down in Engineering in order to… but the only way to get access there is a maintenance hatch, which a man called Grassi has, so you’ll need to head to the Medical section of MedSci to find him. A convoluted sequence of tasks to open a door? Yep, it’s a videogame alright.
Once you’ve restored power, you’ll be able to use this elevator to travel from deck to deck around the ship. Nifty.
S – Security Control Stations
Use these to deactivate any alarms you may set off.

