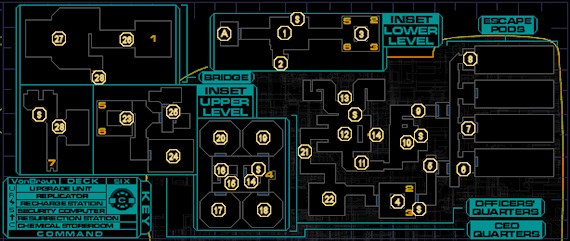
This guide is a walkthrough for a certain area aboard the Von Braun. You can see a map of the respective location and its points of interest, along with a map legend to identify each point. The points are in order and further explained in the “Walkthrough” section below.
Walkthrough
1 – Command B Lobby & Replicator
You’ll be initially stopped by a security door, where you’ll witness Rebecca and Tommy, two survivors on the Von Braun you may have heard in some Audio Logs, running from a 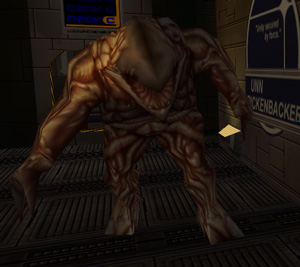 Rumbler. Seems their little plan to escape has gone well, so far. You won’t be able to intervene, so just wait out the scene and proceed forward when the door’s open.
You’ll find a few things in here. The Replicator is broken; repair it for your choice of Vodka, Proximity Grenades, a  Recycler, and Prisms, and hack it for Medical Kits. The corpse floating in the pool has a broken Assault Rifle and some Standard and AP Bullets on him, while the one behind the front desk has 20 Nanites. There are two Crystal Shards on the floor, one near the Replicator and one behind the front desk next to the corpse. Last, there’s 5 Cyber Modules sitting on top of the desk in plain view.
2 – Surgical Unit
An increasingly-rare Surgical Unit is available inside the small cul-de-sac on the right of the Command B Lobby (1), though you’ll want to smash the Security Camera around the corner to the right before using an Activation Key. Rummage through the trash can for 20 Nanites and some Soda.
3 – Bridge Elevator
The elevator here is off-limits until you’ve got the Bridge Access Card from (8). For now, use one of the smaller lifts at the east end of the room to go upstairs to (4). Once you’ve gained access to the main elevator, SHODAN rewards you with 20 more Cyber Modules.
4 – Officers’ Quarters & Escape Pods Elevator Lobby
Destroy the Cyborg Assassin guarding this room, then grab the Audio Log on the floor near the door to the Officers’ Quarters. You’ll have some leeway on where to go here – you can either continue up the second set of lifts to the third floor, take the west door to the Officers’ Quarters, or the east door to the Escape Pods. If you’re following this guide to the letter, then take the door to the east, destroying the Security Camera just past them.
5 – Laser Turret
Smash or hack the Laser Turret guarding this hallway; making use of the Security Control Station back at (4) will make the latter option convenient. Exiting the hallway, you’ll need to jump over the broken bridge to continue; nothing like a gigantic hole in the floor to make your escape easier. If you’ve got Psi Pull, you can also use it to grab a pack of 50 Nanites at the very bottom of the pit.
6 – Escape Pod 1 & Upgrade Unit
As you enter the Escape Pods area, you’ll come under attack by a Cyborg Assassin, and possibly an Annelid Arachnid. Dispose of them in whatever way you wish. You’ll find 31 Nanites on the corpse near the door, a broken Shotgun and some Anti-Personnel Shells on the floor, a French-Epstein Device tucked behind the overturned trash can, and 7 Cyber Modules hidden behind one of the benches.
Only one Upgrade Unit here, on the south wall. Use it if you need to upgrade any of your Weapon skills. Sadly, the Escape Pods are unavailable.
7 – Escape Pod 2
Not much here, except for a Small Beaker hidden underneath one of the benches.
8 – Escape Pod 4 & Bridge Access Card
As you approach, you’ll hear Tommy tell Rebecca they need to leave… and as you run into the room, the last escape pod will carry the couple out into space. Ah, well, it probably would have been awkward to join them anyway. Fortunately, they left behind some goodies for you: a Wrench, some Chips and Vodka, a Maintenance Tool, and, most importantly, the Bridge Access Card. If you like, you can head to the Bridge right now, but the rest of Command B is worth exploring.
9 – Hallway
Be careful heading down this hallway, as you’ll likely come under attack by a 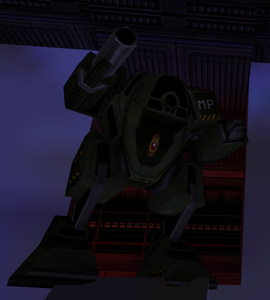 Military Bot and Cyborg Assassin. Aside from that, you can search the corpse on the floor for 23 Nanites.
10 – Bio-Reconstruction Device & Upgrade Unit
Ah, the sweet safety of non-permanent death. You’ll find the helpful machine down the ladder, but be sure to destroy the Security Camera overlooking your descent. The corpse nearby holds 2 Maintenance Tools and an MFD Game Player.
There’s a bit more to this room if you continue down the ladder. Smash your way through the window at the bottom and annihilate the Swarm and Grub Pods. You’ll find 37 Nanites and some EMP Grenades on the corpse, and a Tech Upgrade Unit is ready for your use nearby. Last, hop on top of the steaming pipe in the water, and you should be able to grab 6 Cyber Modules and a Wrench on the upper ledge.
11 – Corpse & Military Bot
Grab the broken Grenade Launcher and Fragmentation Grenades from the corpse, then sneak forward and take out the Military Bot just around the bend.
12 – Officers’ Quarters
Be on the lookout for attacks from Annelid Arachnids, Cyborg Assassins and Protocol Droids while you’re in here, as well as a Security Camera to your right as you enter, just above some pipes. Lots of loot in here. You’ll find an Audio Log on the floor, 17 Nanites behind a bench, some Incendiary Grenades on a corpse, a perfect-quality Shotgun on the floor, 20 Nanites in a shipping container, more Incendiary Grenades and 47 Nanites in the secure crate, and several bottles of Vodka scattered about the room.
13 – Bathrooms
Nab the Audio Log on the ledge just as you come in (partially concealed behind a plant), then check the women’s side for 8 Cyber Modules on the corpse in the showers (beware several Annelid Grubs that attack), and the men’s side for a Maintenance Tool, also in the shower area.
14 – Security Station & Shuttle Bay Access Card
Take heed of the roaming Protocol Droids on this level. The Security Station is locked with a code, 83273, which you’ll come across at (19). Inside, you’ll find some EMP Grenades on the corpse, an EMP Rifle propped against the wall, more EMP Grenades, Larger Beakers, and a Medical Kit in the locked crate. The desk has 23 Nanites and, more importantly, the Shuttle Bay Access Card, which you’ll need later.
15 – Chemical Storeroom
This small room contains an assortment of chemicals, the complete list of which you’ll find at our Chemical Locations page, or in the Chemical Manifest you’ll find here.
16 – Bedrooms
Search in one for a small stash of Prisms and Disruption Grenades; the other has some Fragmentation Grenades in its desk.
17 – Southwest Officers’ Bedrooms
Destroy the Swarm and Grub Pods scattered around the room. You’ll find 34 Nanites on a bedridden corpse, 6 Cyber Modules in a locker, and some Disruption Grenades in another.
18 – Southeast Officers’ Bedrooms
There are no apparent enemies upon entering, but several Annelid Grubs will fall from the ceiling as you try to leave. Grab 41 Nanites from the corpse on the floor, and plunder the storage lockers for a Surgical Unit Activation Key, a Large Beaker and a Medical Kit.
19 – Northeast Officers’ Bedrooms & Security Station Code
Another bedroom, another ambush – a few Annelid Grubs will fall from the ceiling when you approach the back of the room. You’ll find a broken Grenade Launcher on the floor along with some Incendiary Grenades, as well as a Medical Hypo, Anti-Toxin Hypo, 32 Nanites, and some Disruption Grenades in the lockers. Last, one of the lockers also contains an Audio Log with the code to the Security Station (14), 83273. SHODAN rewards you with 20 Cyber Modules for your efforts.
20 – Northwest Offciers’ Bedrooms
In here, destroy the Swarm Pods on the ceiling, then swipe the Prisms from the corpse, and take the Stasis Field Generator if you want it. Most of the storage lockers are empty, save one which contains a Psi Booster.
21 – Hallway
Traveling down this hallway, you’ll find some Prisms in a corner, underneath a pipe, and 26 Nanites plus an Audio Log on a corpse near the end of it.
22 – Common Room
Avoid the Security Camera in the corner of this room as you stroll in. There’s a few things to find in here: an Audio Log on the floor, a corpse with 23 Nanites, EMP and Fragmentation Grenades, a Laser Rapier next to said corpse, and Soda and Cigarettes around the table.
23 – CEO Quarters Elevator Lounge
Be prepared to fight a Laser Turret as you ride up the lift. The door out of the room is wrecked, but you can smash through one of the windows to proceed. On the other side, you’ll find some Anti-Personnel Shells on a corpse, and a bottle of Vodka on the floor.
24 – Conference Room
A Cyborg Assassin will ambush you from the left upon entering the room. When it’s disposed of, check the floor near the door for some Version 2 Modify Software, and the back counter for a Medical Hypo, some Cigarettes and Champagne, and an Audio Log by our old friend Diego.
25 – CEO Quarters & Replicator
The CEO bedroom here as a suit of  Heavy Combat Armor, plus 57 Nanites and a Large Beaker in the safe. The small office, meanwhile, has an… interesting Audio Log by Korenchkin, now one with the Many. The Replicator is happy to sell you Vodka, Anti-Personnel Shells, Psi Hypos, and Rifled Slugs, and can be hacked to spit out Version 3 Repair Software as well.
At this point, you’ve seen almost everything in Command Sector B. One last area remains – head to the locked elevator at (3), and use your new Bridge Access Card to gain entry.
26 – Bridge Access
As if you hadn’t already seen enough, another Military Bot is guarding the way. Duck behind the corner and take the Bot out, staying sharp for any Cyborg Assassins that might creep up on you. Proceed down the hallway.
27 – Bridge
I’ve got to say, I was expecting something a bit more fancy from the Bridge. There’s not too much on the lower floor, but mind the 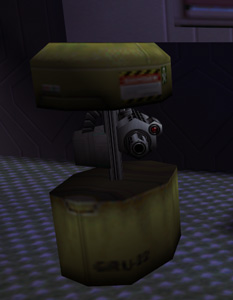 Missile Turret on the upper level near the window, which can do huge amounts of damage to you in a few seconds if you’re not careful, and the Security Camera near the Grav Shafts. There’s 8 Cyber Modules and some AP Bullets to be claimed near said Missile Turret; grab them and ride the Grav Shaft up to the Bridge Upper Level (28).
Later, when attemtping to leave the Von Braun, you’ll need to return here to meet with Korenchkin. As you enter, you’ll come under attack by a floating Annelid, called a 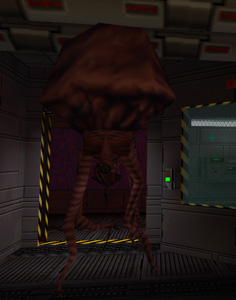 Psi Reaver, which will fire telekinetic energy at you. As the Audio Log you found back in Command A hinted at, to kill the Reaver, you’ll need to destroy its Brain. Travel up the elevator to the Bridge Upper Level (28) and do so, then take the lift back down to destroy the Psi Reaver for good. With luck, it will drop a Psi Reaver Organ for you to research.
28 – Bridge Upper Level
Be ready for a fight, as a Missile Turret will open fire as soon as you come up the Grav Shaft. Scrap it, then proceed forward, nabbing the Medical Kit from the floor and Anti-Toxin Hypo from the corpse. The lounge off to the side contains a lurking Cyborg Assassin, as well as an ICE-Pick and Version 2 Modify Software on the table, and 20 Nanites in the desk. Near the control consoles, hack the secure crate for an Anti-Radiation Hypo, 29 and 53 Nanites, and a  WormMind Implant; there’s also some AP Bullets on the corpse next to it.
Your real goal is sealed in the glass case on the wall. Smash it open and grab the Ops Override Access Card. Now it’s time for a little backtracking, I’m afraid… make your way back to Command A, through Recreation, and take the elevator down to Operations D, then to the Command Center area. There’s a locked office there you’ll now be able to enter.
Upon returning to “meet” with Korenchkin, you’ll find the Psi Reaver’s Brain Structure up here, near the control panels. Destroy it, then grab the Audio Log it drops, and head back down the lift to finish off the Psi reaver.
B – Transition to Command Sector A
E – Elevator
S – Security Control Stations
