This guide will help you complete Retribution, Gaichu’s companion mission in Shadowrun: Hong Kong.
Retribution Map
Retribution Walkthrough
Background
The Tolo Harbour Industrial Complex is a sprawling maze of warehouses, autofabrication facilities, shipping container mazes, and corporate power. If something corporate-owned is shipped through Hong Kong, it invariably moves through these streets.
The Renraku shipping facility lies far enough away from the heart of Tolo Harbour that you won’t have to worry about corporate security other than the on-site guards — and Renraku’s extraterritoriality means that any fighting won’t risk backup from rent-a-cops.
— Mission Complete (Ishida Infected) —
The sun’s rays paint Hong Kong’s mountains in a palette of orange and gold as they speed by outside the train. With a final flash, the sun dips below the horizon, foretelling the inevitable descent into night.
Gaichu is silent as you walk back to the MTR station. His body remains as tense as the cables on a suspension bridge, but his expression is triumphant.
Ishida has been punished. All that awaits him is a slow descent into hunger, and possibly madness.
— Mission Complete (Ishida Killed) —
The sun’s rays paint Hong Kong’s mountains in a palette of orange and gold as they speed by outside the train. With a final flash, the sun dips below the horizon, foretelling the inevitable descent into night.
Gaichu is silent as you walk back to the MTR station. He stares out the window, seeing nothing but the shadows of astral space, lost in thought.
With lshida’s death, the ties between Gaichu and the Red Samurai have finally — decisively — been severed.
Karma Points
- [1] Enter the basement (#11).
- [8] Return to Heoi.
Walkthrough
Once you’ve gained enough trust with  Gaichu (after about four shadowrunner missions), he’ll reveal to you that his former Red Samurai team is in the city, and that he’s drawn up a plan to ambush them, so he can kill them before they kill him. He’ll then detail his plan: you’ll need to steal a prototype drone from Renraku and fake the murder of its designer, and then when the Red Samurai team shows up in response, exterminate them.
To start the mission, you’ll just need to agree to Gaichu’s plan and then take the MTR to Tolo Harbour. This is mostly a combat mission, but it’s a good idea to take along a rigger (for free supplies) and a decker (for karma and paydata). You’ll also need to include Gaichu, of course.
You’ll begin in Tolo Harbour next to an MTR station (#1). You won’t need to do anything tricky here — just head for the warehouse and kill the Renraku guards who get in your way (#3). Next to the warehouse entrance (Exit A), you’ll find a maintenance panel. With Decking 5, you’ll be able to take control of the warehouse’s cameras, which will show you two guards next to a display panel. With Drone Control 5 or  Racter in your party, you’ll be able to overload the panel and deal 16 damage to the two guards.
When you enter the warehouse (Exit A), you’ll encounter four Renraku guards: the two by the display panel plus two more in adjacent rooms. Defeating the guards will finish off all of Renraku’s security forces.
You’ll find the prototype drone (#6) and the scientist who designed it (#5) in the northern part of the warehouse. When you talk to the scientist, you’ll learn that his name is Tanjiro Sasaki, and that he’s the one who hired you for the mission. Tanjiro will inform you that he’s suppressed the alarms, but that you can set them off when you’re ready to face the Red Samurai. He’ll also mention that the quarantine room (#8) might allow you to pick off one of their number when they arrive.
At the end of your conversation with Tanjiro, you’ll have to decide what to do with him. There isn’t any way to fake his death, so you’ll only be able to kill him (and tie up loose ends) or let him go. Either way, Gaichu will agree with your decision, and you’ll get paid for completing the mission, so just select whichever option you like the best. Afterwards, be sure to grab the prototype drone.
To prepare for the Red Samurai response team, you’ll first need to set up the quarantine room (#8). When you interact with the terminal next to its entrance, you’ll be able to “bait” the room and choose which member of the response team to lure into it: the heavy gunner, the mage, or the sniper. The team members all have the same HP and armor, so it’s just a matter of which role you want to eliminate. We picked the sniper, but any of the choices are fine.
Optionally, you can also jack into the Matrix. If you hack the elevator node (#13) and the deliver barrels node (#14), then you’ll unlock the elevator (#11), opening the way into the basement, and have explosive barrels sent down there. You can also grab some paydata (#12). Even if you don’t want to use the basement as your ambush site, you should unlock it anyway since you’ll get a karma point for visiting it.
When you’re ready for the Red Samurai response team, just interact with a security terminal. You’ll find one in the main chamber (#7) and another in the basement (#11). Using the terminal will set off the alarms and immediately put you into combat mode. Then after two turns, the response team will arrive. It shouldn’t be too difficult to kill the Red Samurai soldiers since you’ll outnumber them, and you should start out in good cover.
After winning the battle, you’ll need to talk to Ishida, the Red Samurai captain. Gaichu will want to infect him and turn him into a ghoul, but you can convince Gaichu to kill him instead. Just like with Tanjiro earlier (#5), your decision here won’t change anything in the campaign (other than some of Gaichu’s dialogue later), so you can pick whichever option feels best to you.
To complete the mission, you’ll just need to exit the warehouse (at Exit A) and return to Heoi. When you arrive, you’ll receive 8 karma points, and when you check the mission computer, you’ll receive 1500 nuyen for your work (which you’ll earn from selling the prototype drone). You won’t be able to sell metadata about the mission to Maximum Law. When you talk to Gaichu, he’ll reveal that he confiscated Ishida’s sword, which will allow him to use a 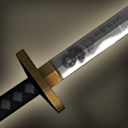 Bloodthirsty Katana during future missions.
Mission Overview
1 – MTR Station
2 – Medical Supplies
You’ll find a  DocWagon Trauma Kit here.
3 – Renraku Guards
You’ll encounter four guards total at these two spots.
4 – Terminal
Using this terminal (#4) will allow you to jack into the Matrix (#4a), where you’ll find paydata (#12) and more.
5 – Tanjiro Sasaki
6 – Prototype Drone
7 – Security Terminal
8 – Quarantine Room
9 – Vent
10 – Locked Storage Room
The only way to open this room is to send a drone through the nearby vent (#9), and have it open the door from behind. Inside, you’ll find an  Advanced Medkit and
  Shamanic Salve (II).
11 – Locked Elevator / Basement
You can unlock this elevator and the basement in the Matrix (#11). Going down there will earn you a karma point. You’ll also find an Advanced Medkit there that you can loot.
12 – Datastore
Hacking this node will give you Paydata: Renraku Product Launch Schedule, which you’ll be able to sell on the Shadowland BBS for 540 nuyen.
13 – Elevator
Hacking this node will unlock the elevator (#11).
14 – Deliver Barrels to Basement
Hacking this node will cause explosive barrels to appear in the basement (#11).
Exits
- Warehouse entrance.