The Uniao faction believes there are rich exotic deposits in the Arctic, so they’re sending you to find and mine them. In this guide we will list the relevant details of the mission, followed by a step-by-step walkthrough.
Prospect Details
Approximate time to complete: 3-6 hours, maybe more — depending on how lucky/unlucky you get with ore spawns, this mission can require venturing into a significant number of caves. Bringing friends to help you mine can also make this mission go faster.
Difficulty: Medium — most of the challenge comes from teching up to Tier 4; the Forest biome you drop in isn’t particularly dangerous, and you only have to go a short ways into the Arctic.
Recommended Level:30 — You must be (or reach) level 30 during this mission in order to complete it.
Use the Radar and map screen to locate Exotics deposits
Fully mine an Exotics deposit
Return Exotics to orbit
Rewards
400
Variants Modifiers
Creature melee damage: -50%
Creature health: -50%
Creature movement speed: -10%
Bear spawn rate: -50%
Lion spawn rate: -10%
Polar bear spawn rate: -50%
Wolf spawn rate: -10%
Aggressive creatures perception: -50%
Neutral creatures perception: -50%
Passive creatures perception: -50%
Experience gain: -25%
Creature melee damage: +20%
Creature health: +30%
Creature movement speed: +10%
Aggressive creatures perception: +30%
Neutral creatures perception: +30%
Passive creatures perception: +30%
Scorpion spawn rate: +30%
Lion spawn rate: +30%
Wolf spawn rate: +30%
Experience gain: +25%
Player respawn count: 3
Prospect Notes
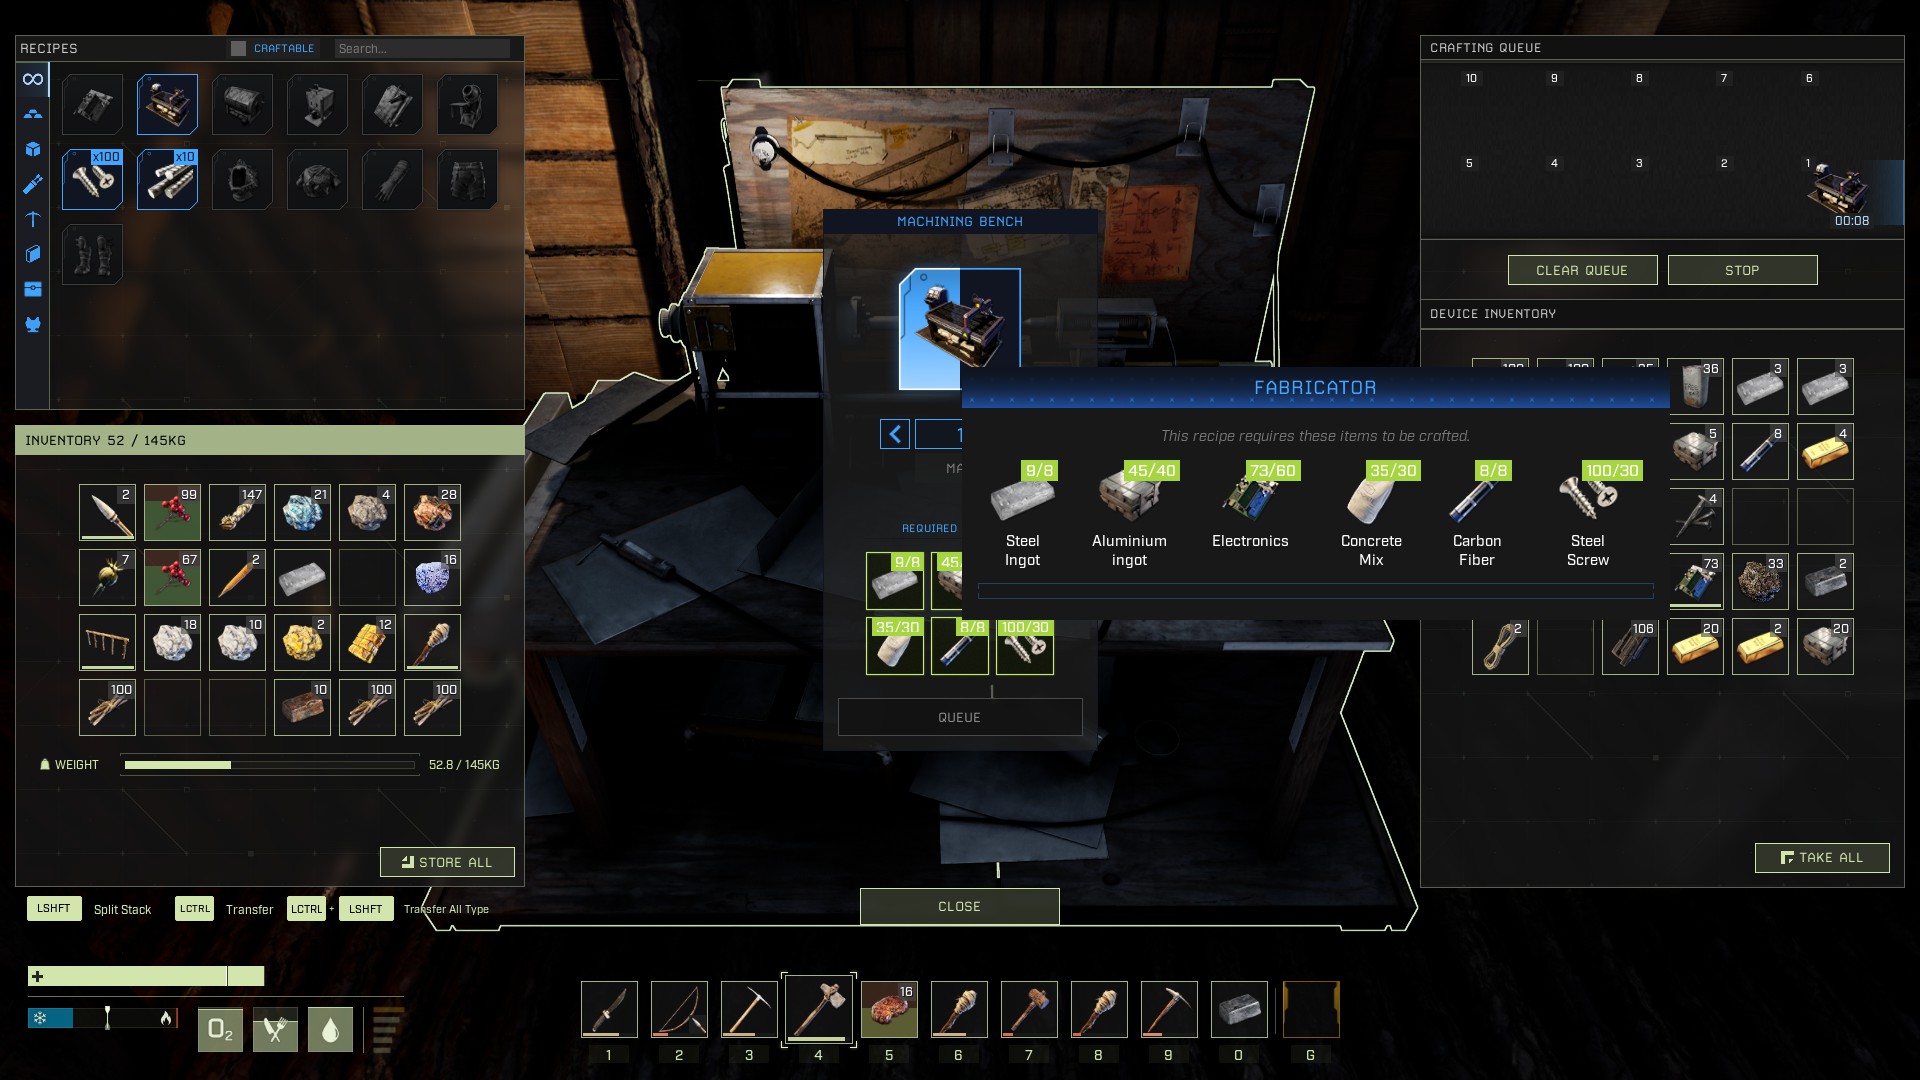
To complete the objectives, you’ll need to tech all the way up to Planetary Tech Tier 4 in order to craft a Radar and Extractor. You’ll then need to use the radar to locate an Exotics deposit, and then use the Extractor to mine it. This mission can be time-consuming: the materials required to tech up to Tier 4 and craft the equipment you need will take a long time to collect.
It’s worth noting that you don’t actually have to complete the mission to unlock the ability to collect Exotics — at least for now. Once you land on Icarus, you can open your tech tree, and as long as you have the two Blueprint Points you need, you can unlock the Extractor and the Radar from Tier 4, and then leave the planet. You should then be able to craft both objects and mine Exotic veins on most missions.
You’ll be spending a lot of time at your crafting stations in this mission
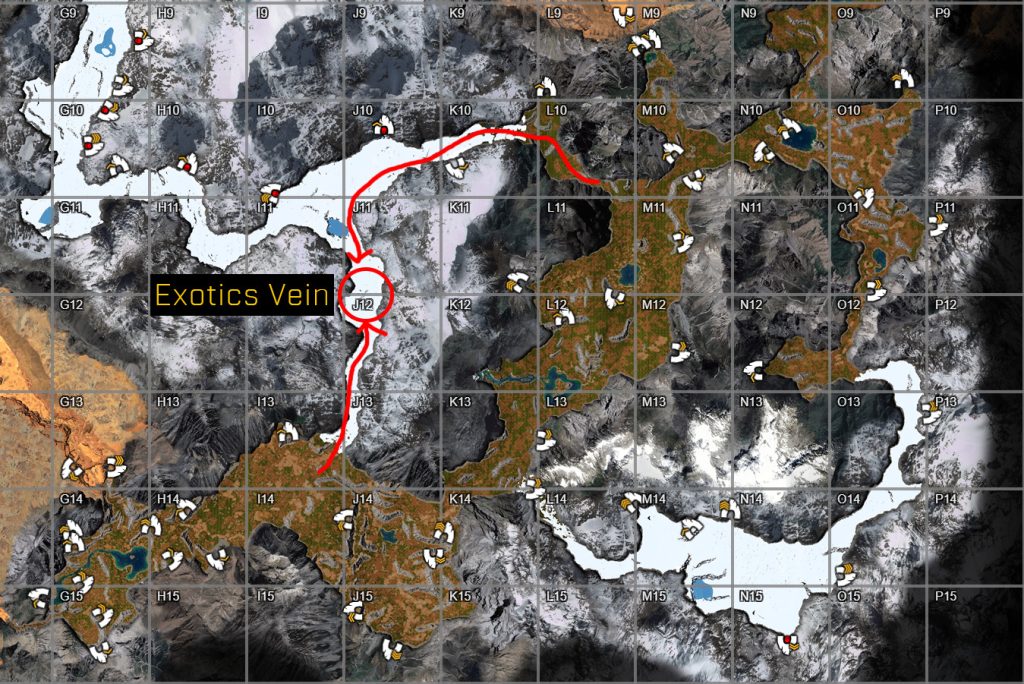
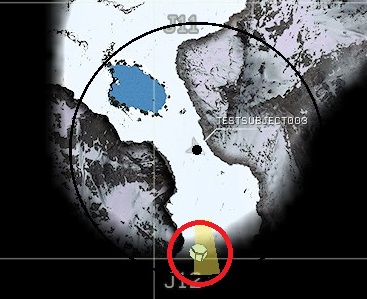
The red circle indicates the location of the objective; the red lines are the two possible routes to the Exotics Vein
The northern entrance to the Arctic in L-10 has lower-level predators, but the route through J-13 is a bit shorter. Really, whichever entrance you’re closer to once you’ve finished teching up is probably the better route to take.
We’ve included a map with caves for your convenience, but if you want a map you can zoom in on to help you locate caves, Icarus Intel is a fantastic resource (and where the image for this map came from). (Huge thank you to Finally Rage and everyone who contributed!)
Preparing for PAYDAY
It’s a good idea to bring one of the advanced Pickaxes (not the one that unlocks the rest) from the Workshop, as this will save you a significant amount of time when you’re first mining ores.
This prospect Necessitates reaching Tier 4. Therefore, there are a significant number of blueprints you’ll need to have or unlock during this mission, in addition to the usual survival tools.:
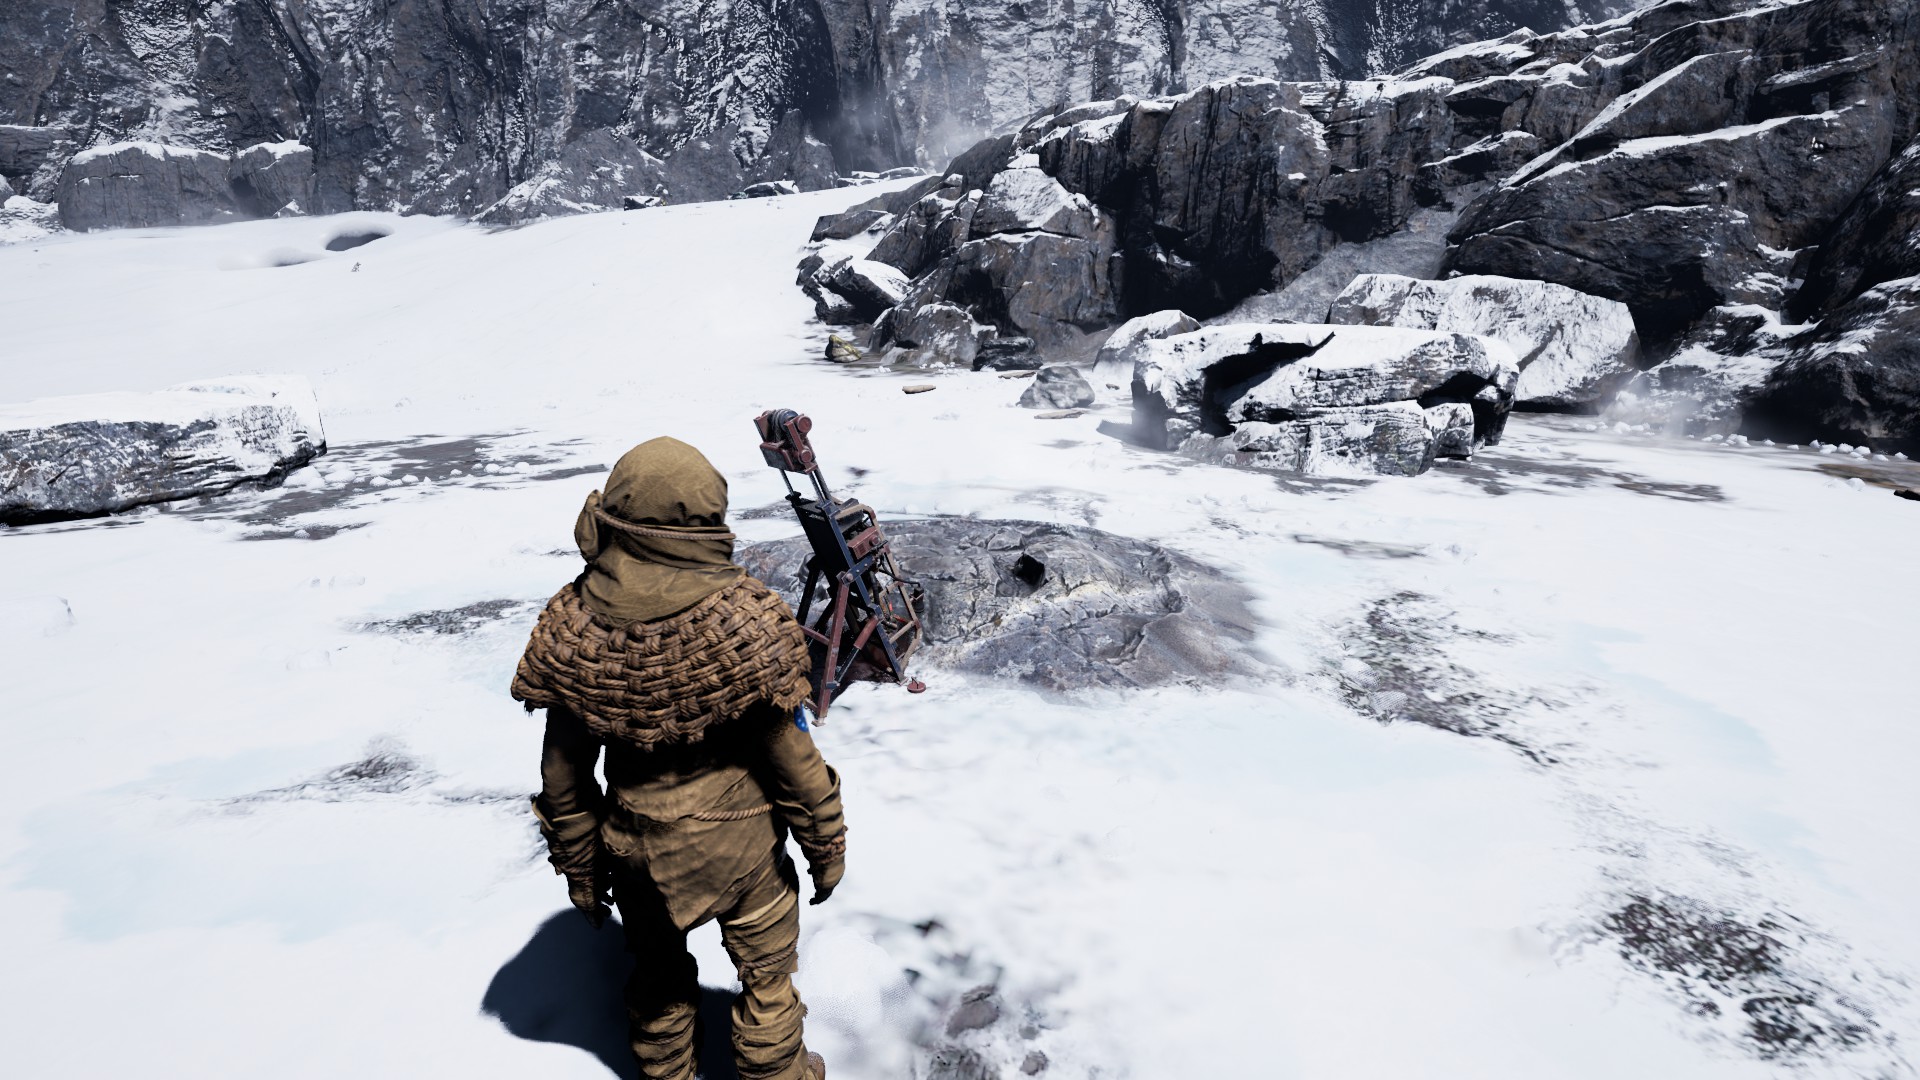
These guys can be a piece of cake, or a serious pain, depending on how you handle them.The trick is to move slowly into a cave so that only one or two pop up at a time. When they do, if they’re close, simply sprint up to them and knife them in the mouth. If they’re far away, quickly shoot two arrows at their mouth. If you’re fast, you can kill them before they get a chance to attack.
You don’t need a light source to see the cave worms, since their mouths glow in the dark
If you don’t notice them pop up and either hear them spit, or start taking damage, run back the way you came, then slowly move back towards them to find them. You can dodge the poison if you’re very fast and move perpendicular, but this is hard to do in a cave. It’s a good idea to have a stack of Cooked Meat when you enter caves, just in case you screw up and need to heal.
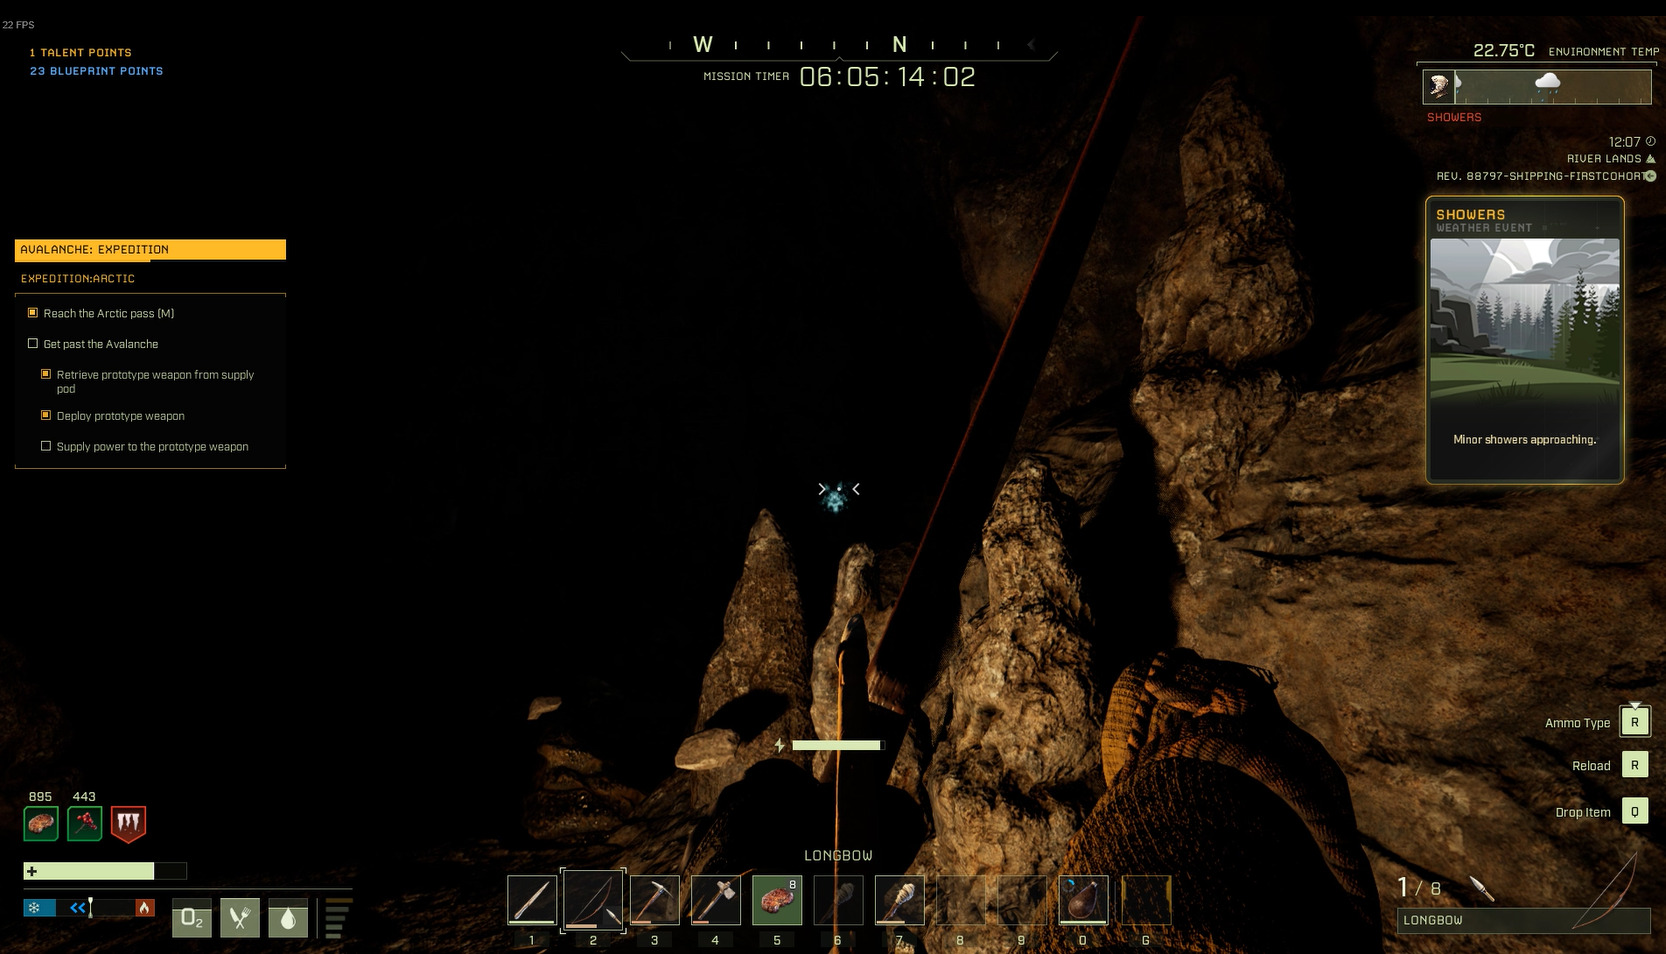
Mission Walkthrough
Step 1: Teching to Tier 4
We won’t be giving step-by-step directions for this part of the mission, since it boils down to this: collect a ton of resources and mine every cave you can until you’ve got what you need. There are too many resources required to list them all here, so instead here’s an ordered list of all the workbenches and other deployables you need to craft, and what they’re used for:
You’ll need at least 6 Biofuel Cans to power the drill, and it can sometimes require more than 7 cans to fully mine the vein and complete your mission. You’ll also need to use a can at some point to power your Electric Furnace and create Composites.You can easily bring your Biofuel Composter, a Biofuel Can and the materials for fuel into the Arctic. However, it takes 8 minutes and 20 to fill a Biofuel Can, so you’ll end up spending at least 30 minuets in the Arctic drilling if you fill them all while you’re there. Therefore, it’s usually best to craft 7 or 8 cans, fill them, and bring them with you.
It’s also worth noting that the Exotics vein on this mission seems to sometimes have 2, or even 3 snap points for the Extractor, each with their own separate quantity of Exotic ore. You can choose to bring extra Extractors and/or Biofuel Cans, or you can simply move the Extractor to the other snap point(s) when you’ve finished with the first one.
The Electric Furnace will require power, so you’ll need to craft the Biofuel Generator and fill a Biofuel Can via the Biofuel Composter before you can create Composites (which are a required material for the Radar). You’ll also need to craft the Electricity Tool and use it to connect the generator to the furnace (see our Electricity guide for details on how this works).
Once you’ve crafted all the Composites you need, you can disassemble both your Material Processor and Electric Furnace to recover some materials and perhaps save yourself a cave trip or two.
It’s a good idea to craft the highest-tier Pickaxe you can every time you tech up to the next tech tier. Having a higher-tier pickaxe makes mining faster, and also increases yields from ore deposits. Crafting a backpack can also help with mining missions — check out our Mining guide for more tips on mining effectively.
Step 2: Expedition to the Arctic
Once you’ve crafted the Radar and the Extractor, you’ll need to find a way to get both into the Arctic. For solo players, this can be tricky, since both pieces of equipment take up your sole [G] hotbar slot, and neither item can be placed in your inventory any other way. The best way to deal with this is to simply bring your Fabricator and the materials required for the Extractor into the Arctic with you. Here’s the full list of things you’ll need to bring with you:
2×1 Portable Shelter (add a few beams for support beneath it) – Wood or better
6 Walls
4 Floors
6 Beams
Biofuel Composter (if you decided to just fill 7+ Biofuel Cans, you don’t have to bring this)
Biofuel Can (if you have the materials, craft an extra so you can fill one while the drill runs)
Tree Sap + Organic Material of your choice to fill Biofuel Cans (check recipes at the composter before you go to make sure you have enough fuel for 8 full cans — you’ll need 100 Tree Sap for each recipe)
Once you’ve got everything, you can set out. The Exotics vein is located directly on the border of J-11 and J-12 — once you get there, set up the radar and activate it. Unlike during the Scan missions, this doesn’t seem to draw predators. Once the Radar finishes scanning, you should be able to see the Exotics Vein on your map. Double-click it to set a waypoint and then head that way with the Extractor.
The Exotics Vein as it appears on the map — set your radar up on the border of J-11 and J-12 to ensure you find it first try
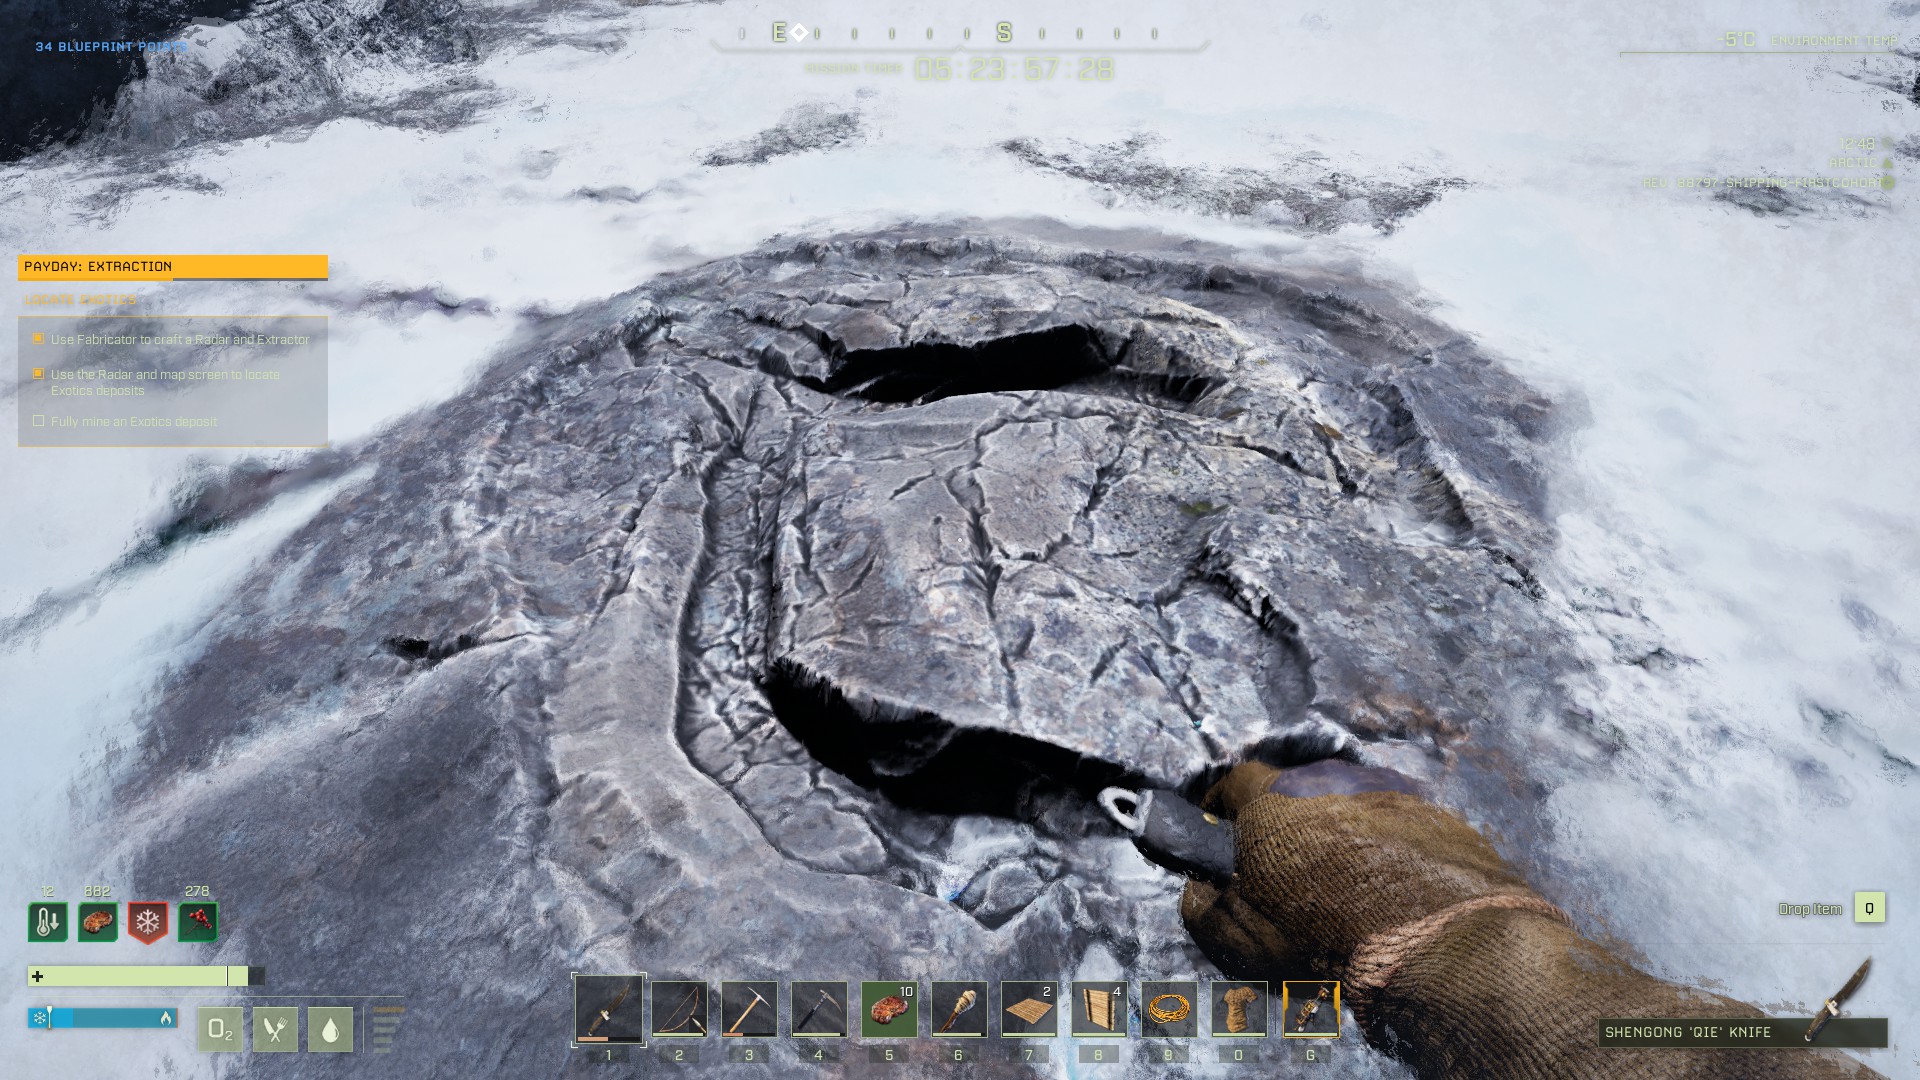
There’s a stony, cracked region of ground that indicates the dig site. Once you find it, set up your portable shelter, and deploy your Fabricator and Biofuel Composter. Craft the Extractor, then deploy it on the dig site. You’ll need to fill a Biofuel Can at the composter, then place the filled can in the Extractor’s Fuel slot before you can activate the drill. If you brought a second can, fill that one at the composter while the drill drains the first can.
An Exotics Vein
After about 6 or 7 Biofuel Cans worth of drill time, you should get a notification from Sol that you’ve fully mined the deposit, and you’ll get a new objective to return to Orbit with exotics. Grab all the exotics from the deposit inventory (accessed via the Extractor) and head back to the dropship. Make sure the Exotics are either in your hotbar or in the Dropship Cargo slots, then leave the surface!
With this mission complete, you should now be able to use the Radar on any ICARUS mission to find Exotic Veins, and then use the Extractor to mine them. Since we gave away the location of the deposit here, we didn’t go over how to use the Radar to hone in on Exotic Vein locations — see here for more details on doing so.
We hope this walkthrough for PAYDAY was helpful. Please feel free to leave questions and suggestions in the comments below, and happy drilling!
Share this article:
DanielD
Unabashed FromSoftware fanboy still learning to take his time with games (and everything else, really). The time he doesn't spend on games is spent on music, books, or occasionally going outside.