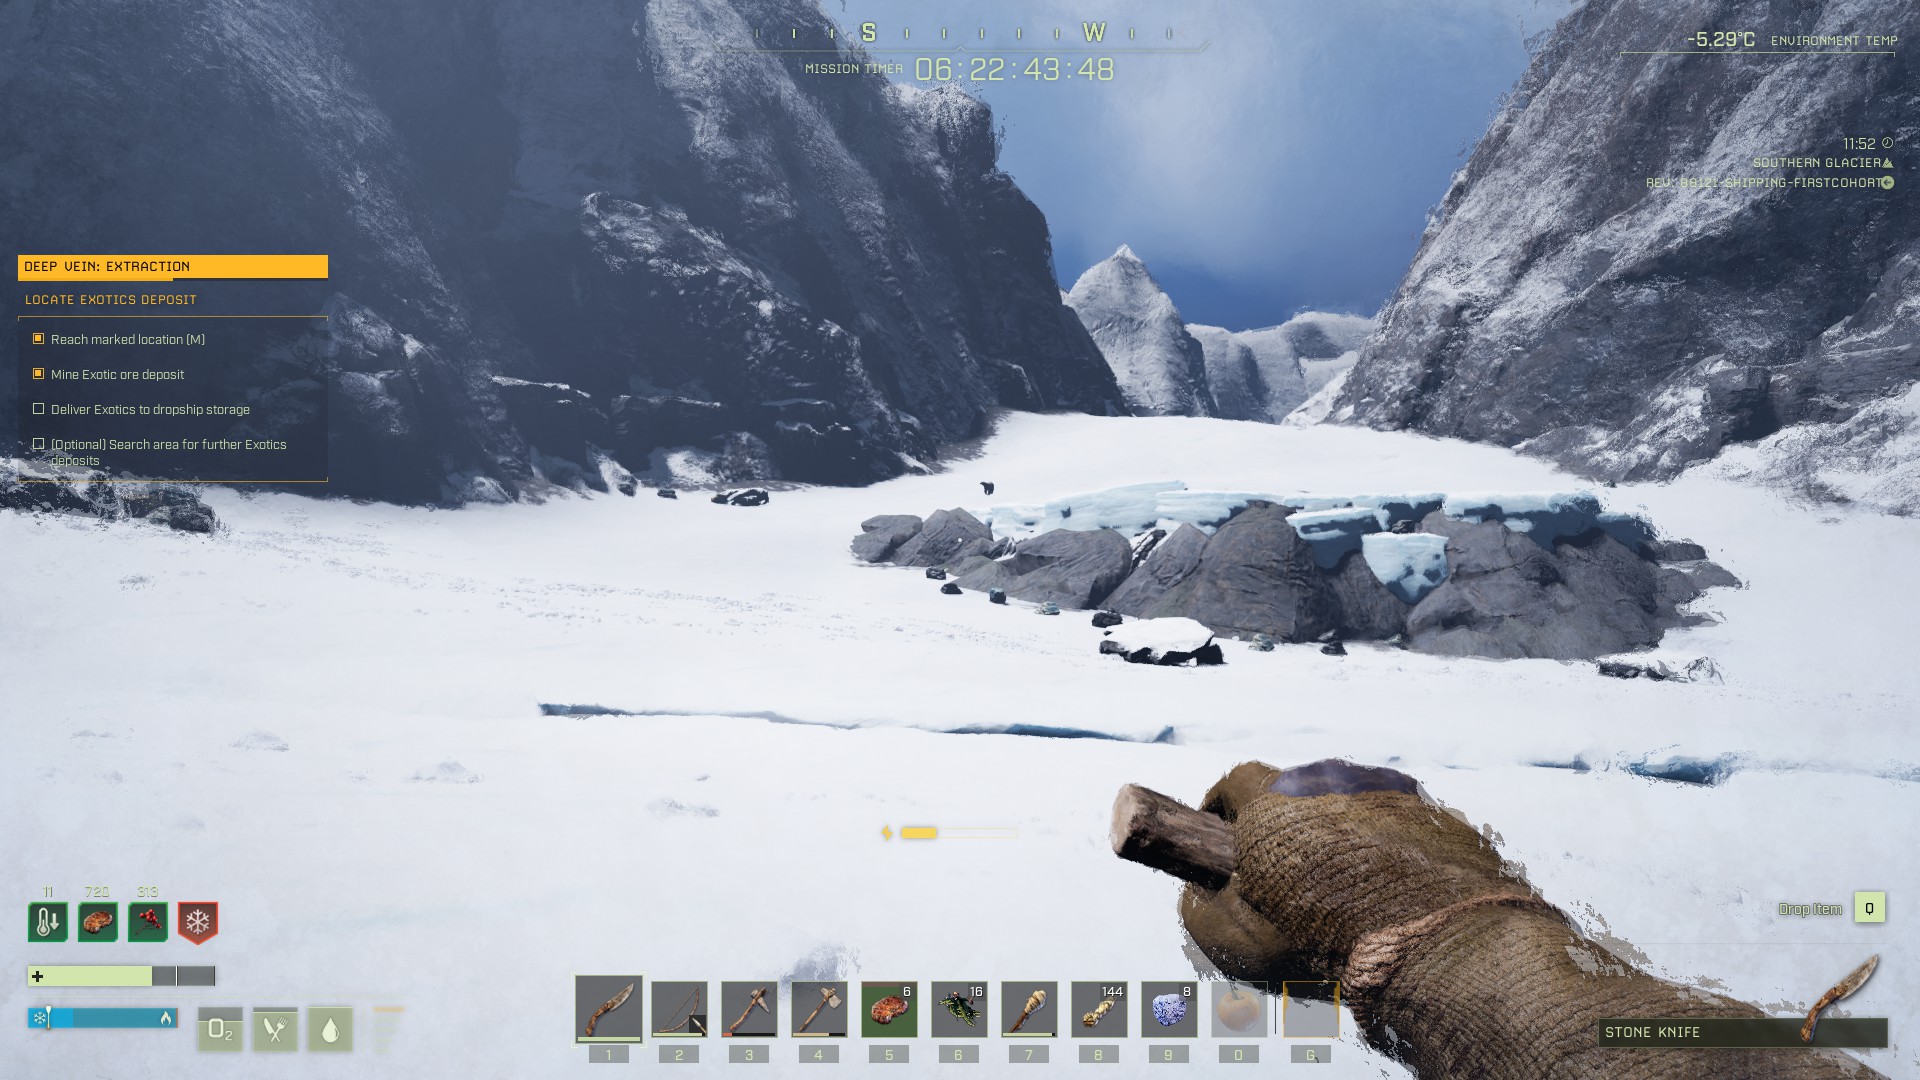
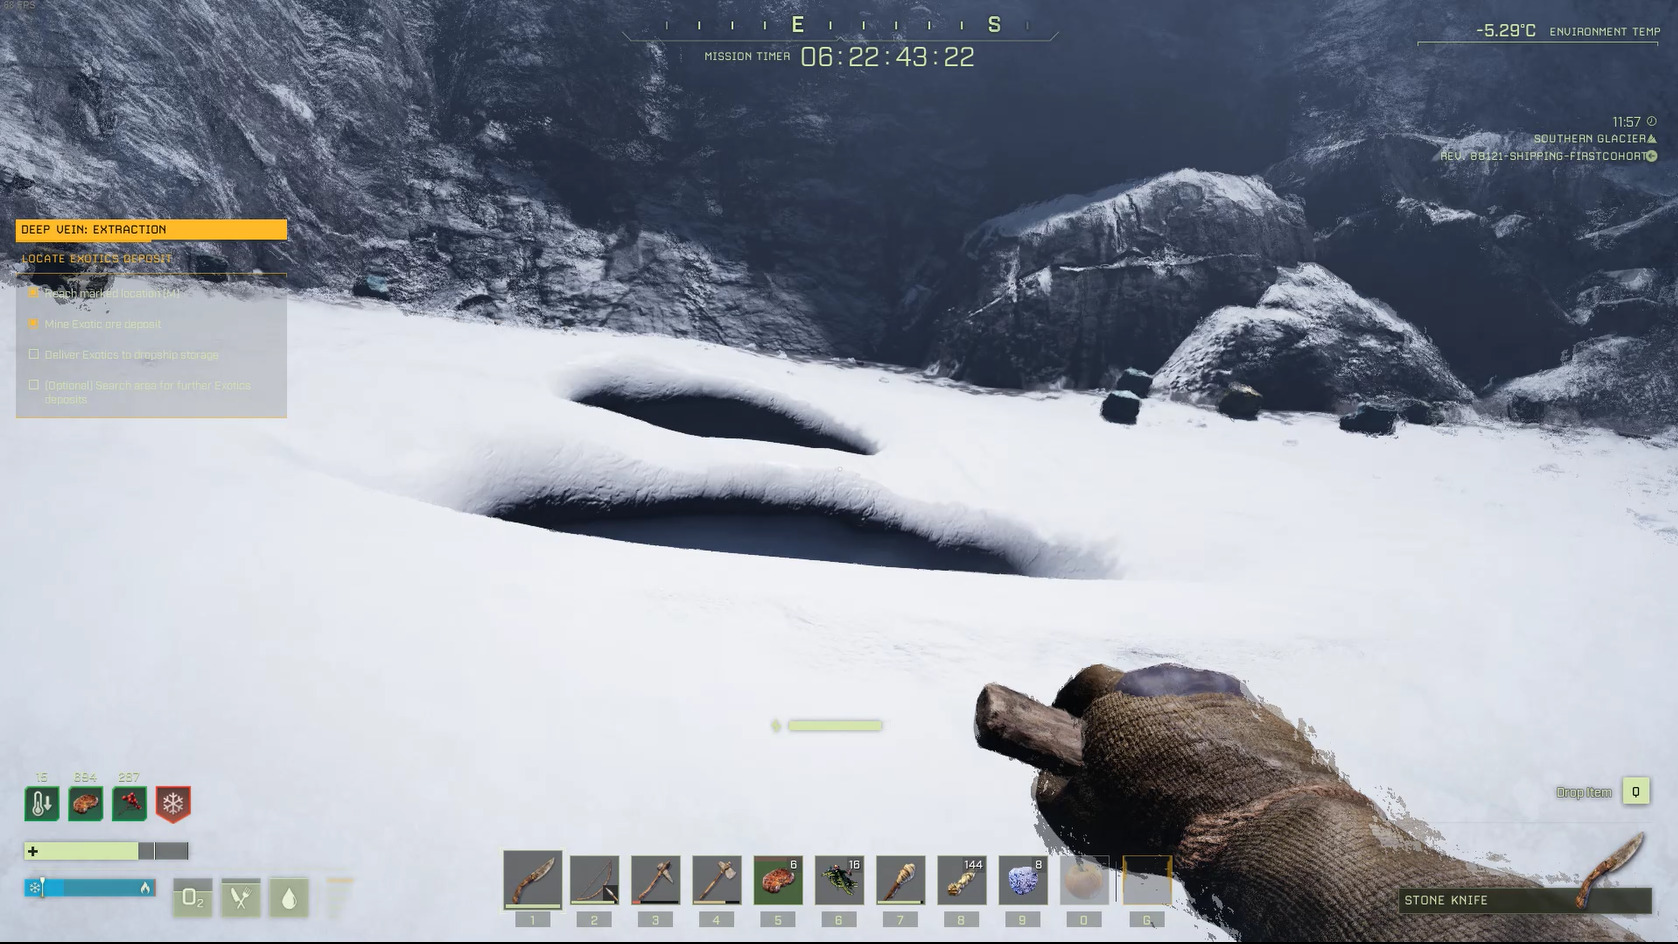
In the DEEP VEIN mission, you’ll be searching for and then mining Exotics in the Arctic. This guide will first list the relevant details of the mission, and then provide a step-by-step walkthrough.
To complete the objectives, you’ll need to make your way to the Arctic location of the Exotic ore, mine some, and then return it to the dropship. While you only need to obtain a small amount to complete the mission, you can collect more by venturing deeper into the Arctic. Currently, there’s a bug you need to know about to finish this prospect:To complete the final mission objective, you’ll need to manually drag any amount of Exotic Ore from your inventory into the Dropship Cargo and then leave the Dropship menu.
Exotic Ore
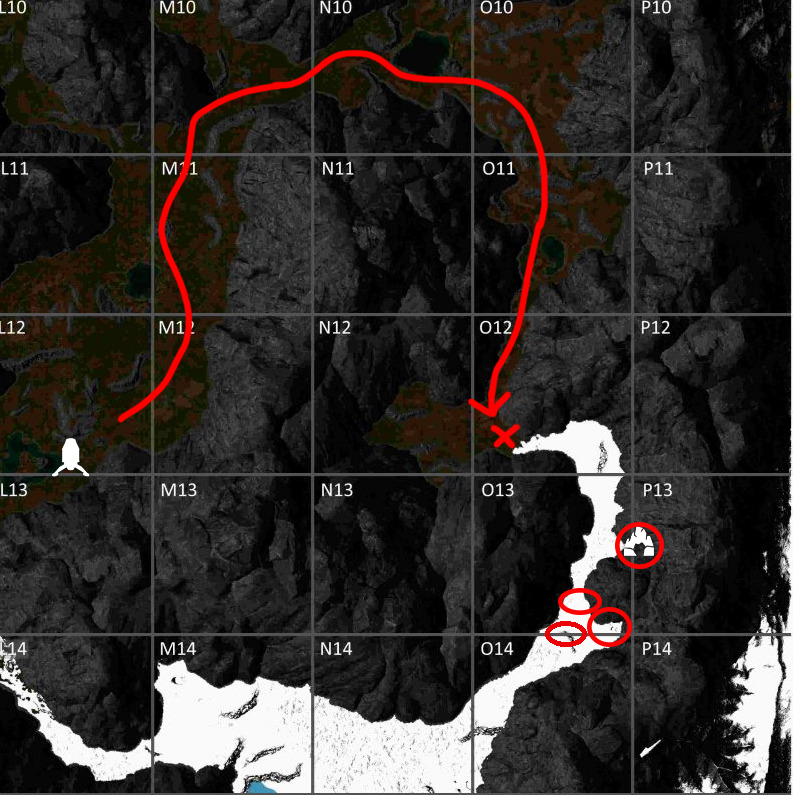
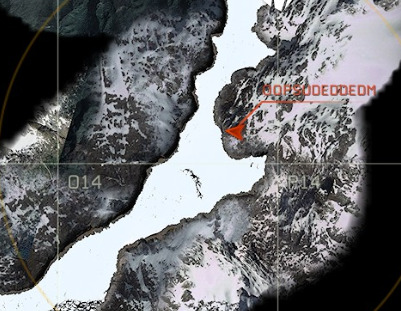
Red arrow indicates route from dropship to objectives; the X is a suggested base location; circles indicate objective locations;
Preparing for DEEP VEIN
Listed below is the minimum gear required for completing the mission.
Stone Pickaxeor better – If you have accses to a Pickaxe from the workshop that gives higher than the standard “+100% Yield”, bringing it will increase the amount of Exotic Ore you can collect. (Thanks to EIP user Murk for pointing this out).
It’s also a good idea to bring a Canteen from the Workshop if you have access to one — it will save you having to worry about collecting Berries.
The following talents will dramatically increase your chances of survival:
Very, Very Quiet [Solo – Solo]: 1 point
-15% perceived threat while in stealth. If you want to avoid polar bears bears, you’ll want this.
Without a Sound [Survival – Hunting]: 1 point
-5/10/15% perceived threat while stealthed. If you want to avoid polar bears even more, you’ll want this too if you can get it.
Mission Walkthrough
Note: Unlike many previous missions, you must make it back to the dropship with your mission objectives (Exotics) in your inventory. Therefore, dying to return to the dropship will not allow you to complete the mission.
Part 1: Hiking to the Arctic, Setting up Camp
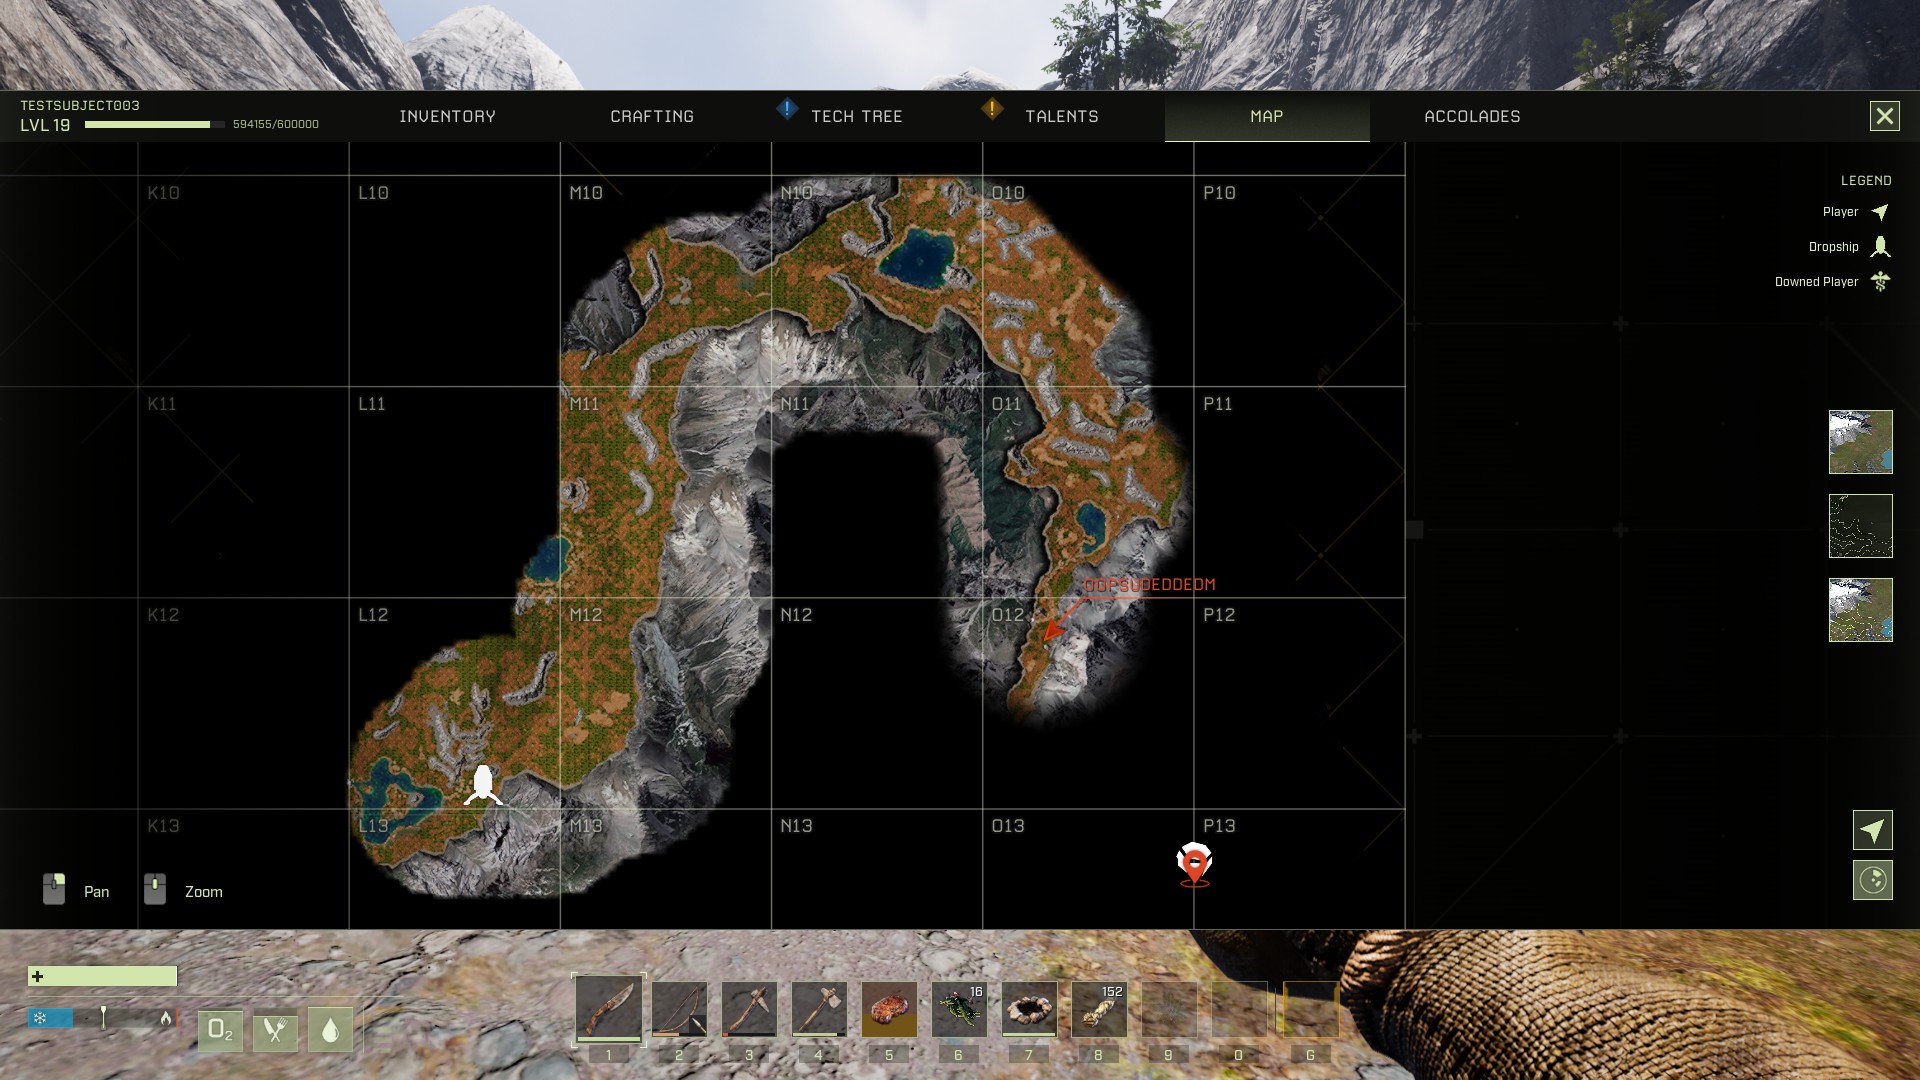
Once you land, open your map and find the objective marker to your east — you’ll need to hike north, east, and then south to make your way around the mountains (see ma above for specific route). As you head towards your objective, collect materials until you’ve crafted all the basics: a knife, bow and arrows, pickaxe, axe, and cloth armor. Once you’ve killed a few animals and collected a few veggies, set up a Campfire and cook some of your food while chopping down a couple of trees for the shelter you’ll build later. If you didn’t bring a Canteen, make special care to collect as many Berries as possible so you don’t have to craft a Waterskin.
Once you’ve got few cooked food items, eat some to raise your max stamina, pack up your campfire, and continue heading towards the objective. You’ll want to kill any predators you encounter in your path, plus any easy-to-hit prey animals, until you’ve got at least 20 Raw Meat and enough materials to craft a Bedroll. Keep the mountain on your right so you can avoid predators — it’s mostly wolves, but you can never be too careful. You’ll probably run into a bear in the northern section of grid O-12; this is a fairly narrow area, so go slowly and stay out of its way.
The approximate location of the bear in O-12
Continue to the southwestern portion of O-12. Once you can see the Arctic transition area, set up camp nearby in the Forest, placing down a Bedroll and setting it as your spawn point. Start cooking any remaining food you have, and if you don’t have enough for a full stack of meat, hunt nearby animals. Also harvest a full stack of Oxite, and fill any water vessel you brought with you at the stream that runs north-south through O-12.
Part 2: Into the Arctic, Mining Your First Exotics
If you want, you can craft another Wooden Shelter (4 Walls, 2 Floors)and bring it with you into the Arctic along with your Campfire. However, it’s very likely you’ll be able to run to the cave mentioned below if there’s bad weather, and if all goes well you won’t be spending very long in the Arctic. Therefore this is optional.
If you failed to collect at least ~50 Berries, and you didn’t bring a canteen of some kind from orbit, you’ll want a Waterskin just in case you get lost while in the Arctic. You can fill it by melting Ice at a campfire (don’t forget to put your Waterskin in the campfire’s inventory), or you can fill it at the aforementioned stream in O-12.
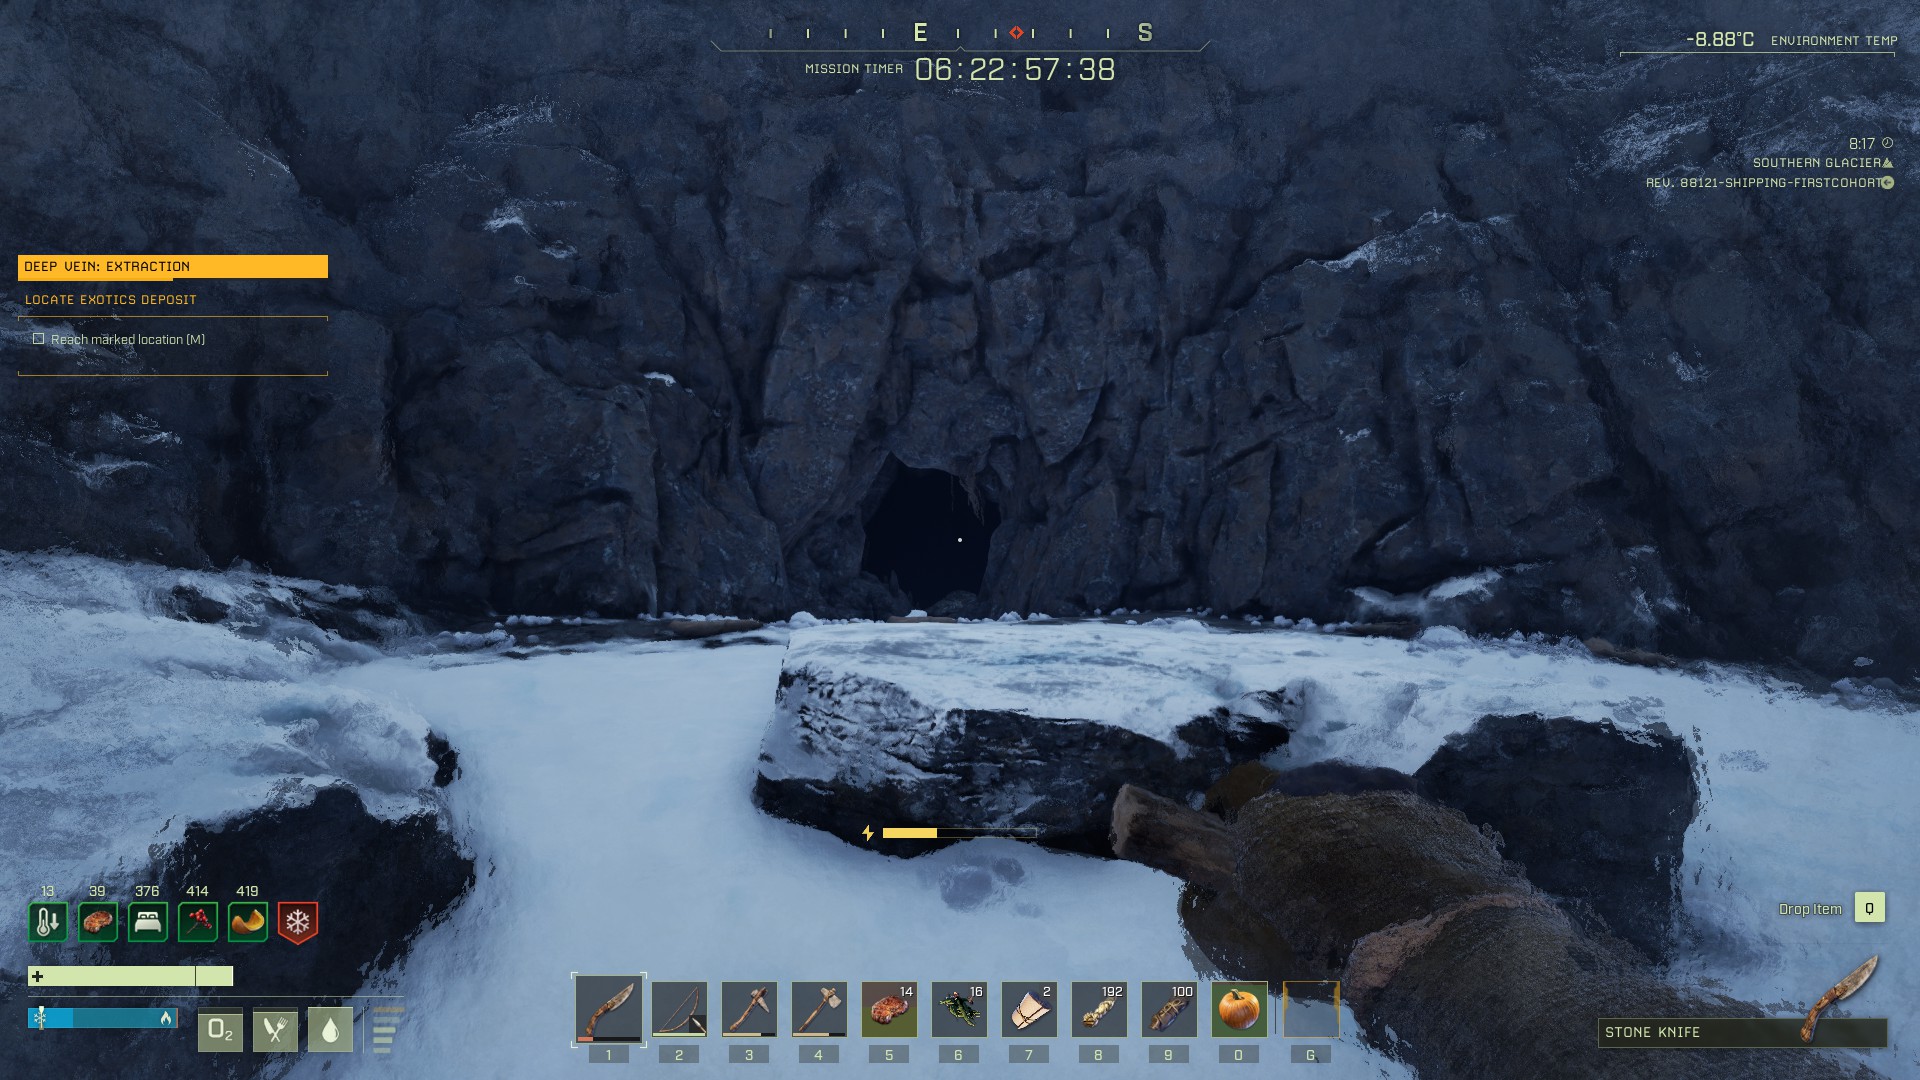
Once you’re fully hydrated, and you’ve got yourself a Wood Rag Torch, a full stack of Meat,and full Cloth Armor on, you’re ready to head out. Move quickly through the Arctic, but always keep an eye out for Polar Bears, and crouch around any blind corners or large rocks. You’ll probably pass at least one and perhaps even two Polar Bears on your way to the cave in O-13.
The cave you’re looking for is on the eastern edge of the middle of O-13. There will be a couple of Cave Worms inside, but they’re easily handled with your knife (they end up doing more damage if you try to engage them from range). Aim for the worm’s mouth for maximum damage. Before you enter the cave, pull out your torch and light it. Then sprint into the cave mouth, drop your torch with [Q], then pull out your knife and fight the worms (careful not to step on your torch as you do so). There will be one worm by the entrance to the cave, and one slightly further back.
The cave is pretty hard to miss
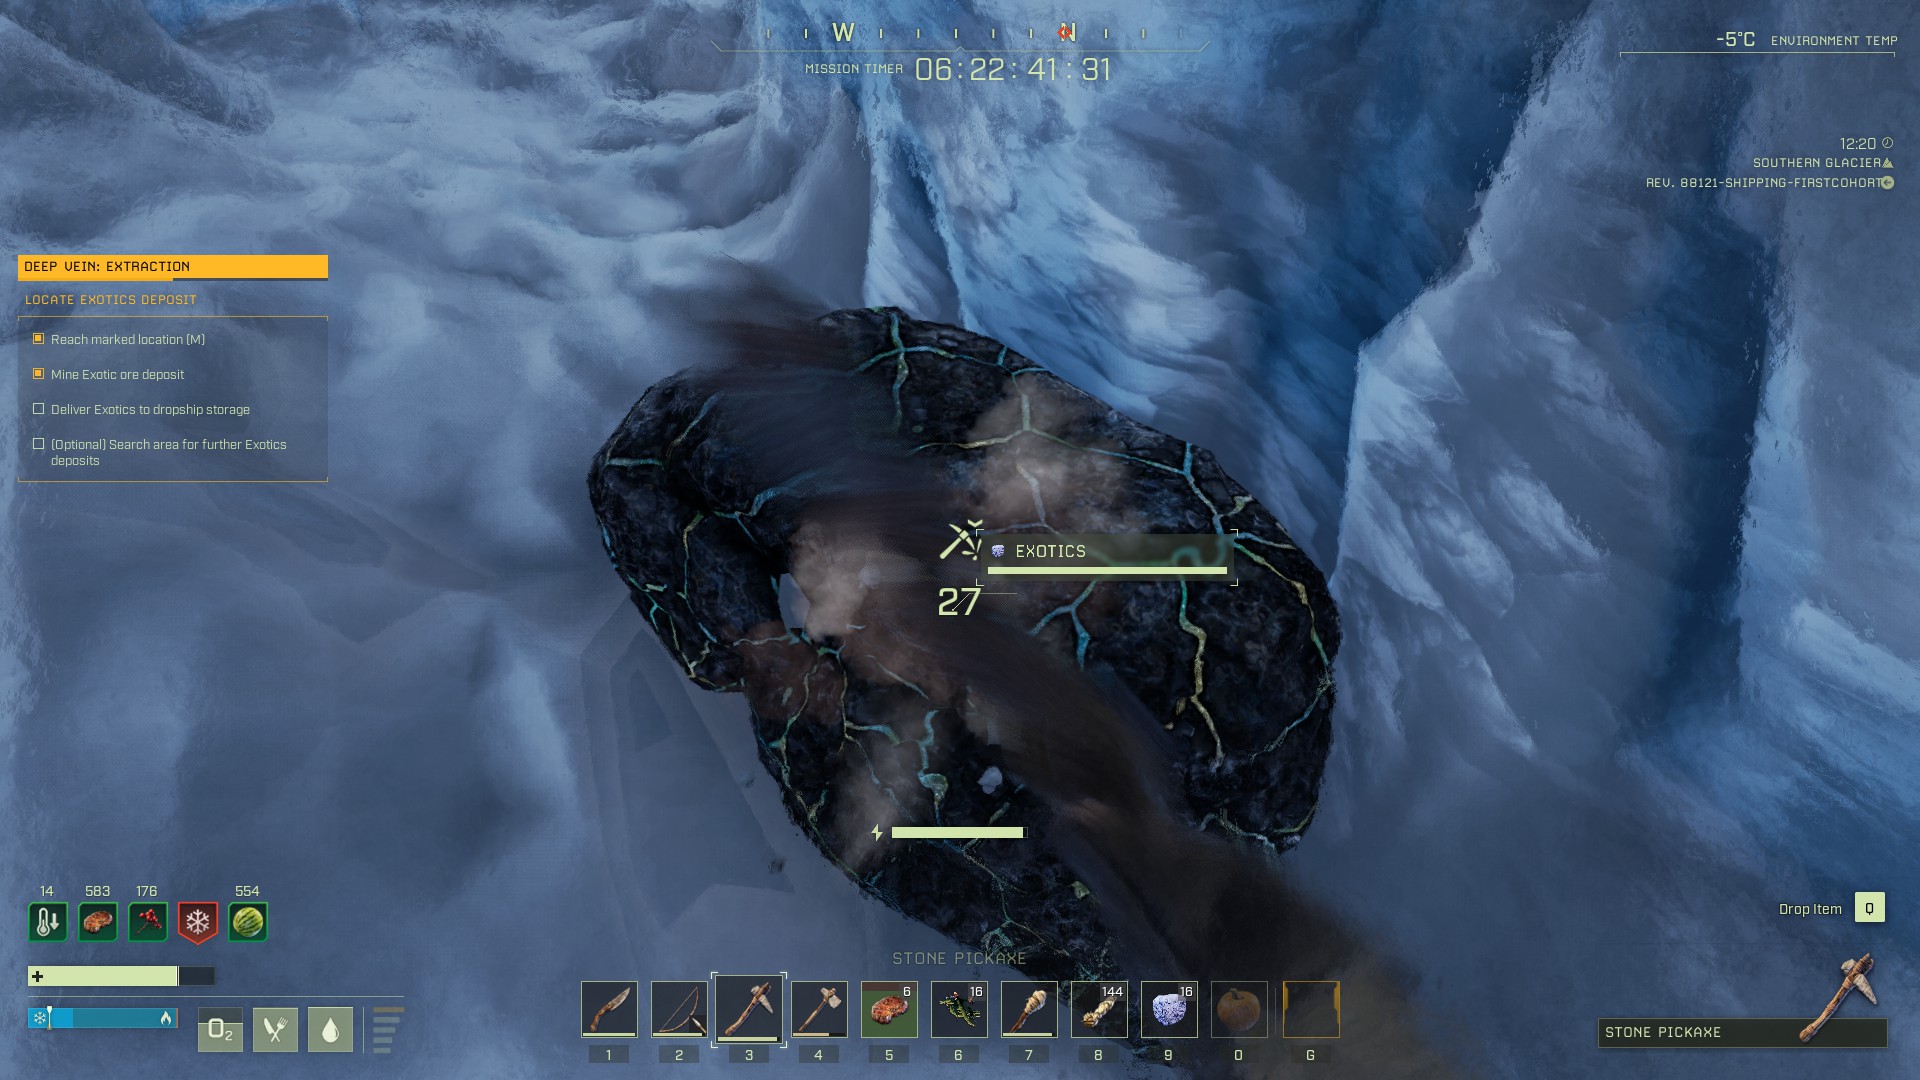
With both worms dispatched, you can pull out your pickaxe and mine the Exotic ore. There’s usually only one node in the cave, but reportedly a second Exotic ore node can sometimes spawn, so double-check before you leave. At this point, you’re technically done with the mission, and could return to the drop pod with the Exotics currently in your inventory. That being said, you came all the way out here… so you might as well grab a bit more Exotic ore before you leave.
Part 3: The Remaining Exotics & The Trip Home
Note: We’ve gotten reports of another node on a cliff somewhere in the marked area — we’ll try and get the guide updated ASAP with the fourth node, but if anyone has a screenshot or map location they can share, we’d love to add it to the guide to help other Prospectors!
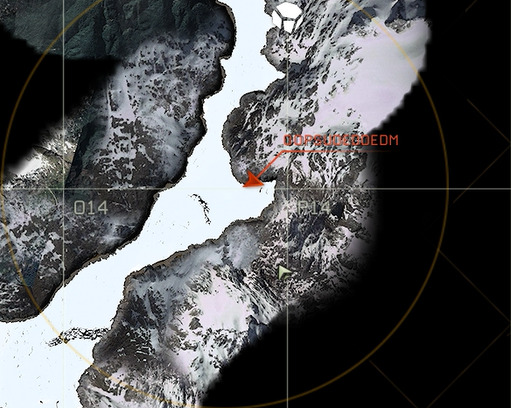
Exit the cave and continue south, staying in the middle of the valley. You should come across a narrow crevasse in the bottom third of O-13 (see map) — head to the left (eastern) end of it to make your way down and find your second Exotic node.
The map location of the crevasse (incorrect east/west, but the north/south coordinates are accurate)The crevasseYour reward
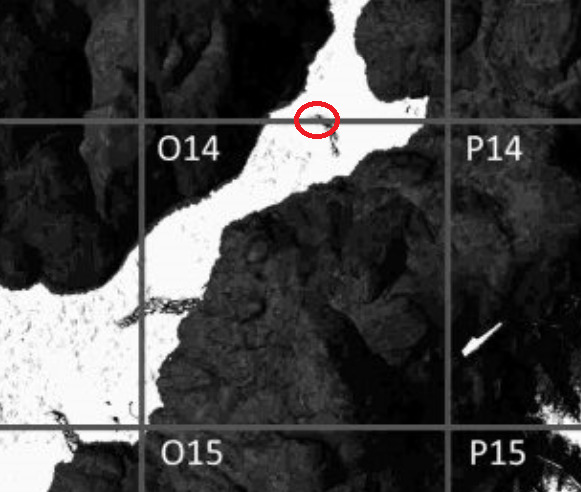
Climb out of the crevasse (you can use the Unstuck option from the [Esc] menu if you get stuck, but be warned you might spawn on top of a Polar Bear — use this only if necessary) and continue southeast, keeping the mountains on your left. Once you round the corner, you should look for a kind of pit in the snow, which contains the final Exotic ore node.
The map location of the pitLook for thisYour reward
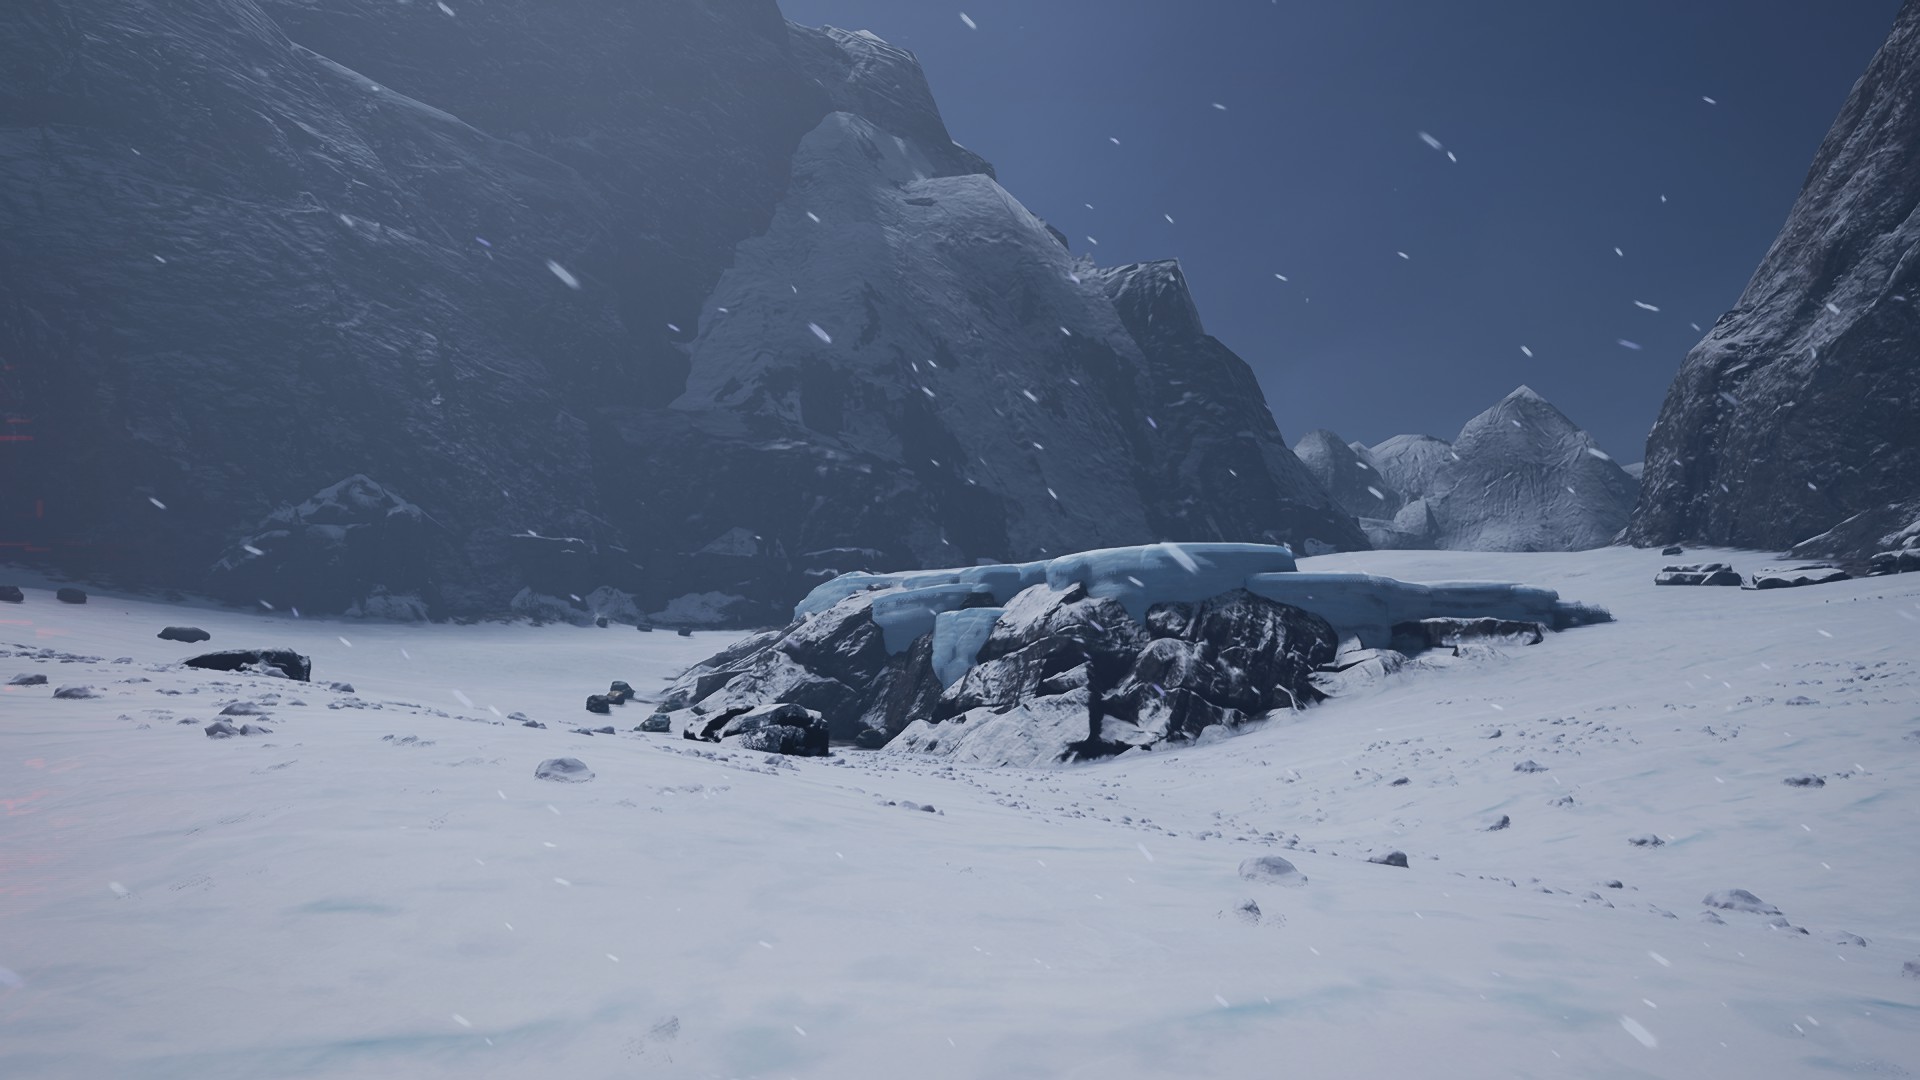
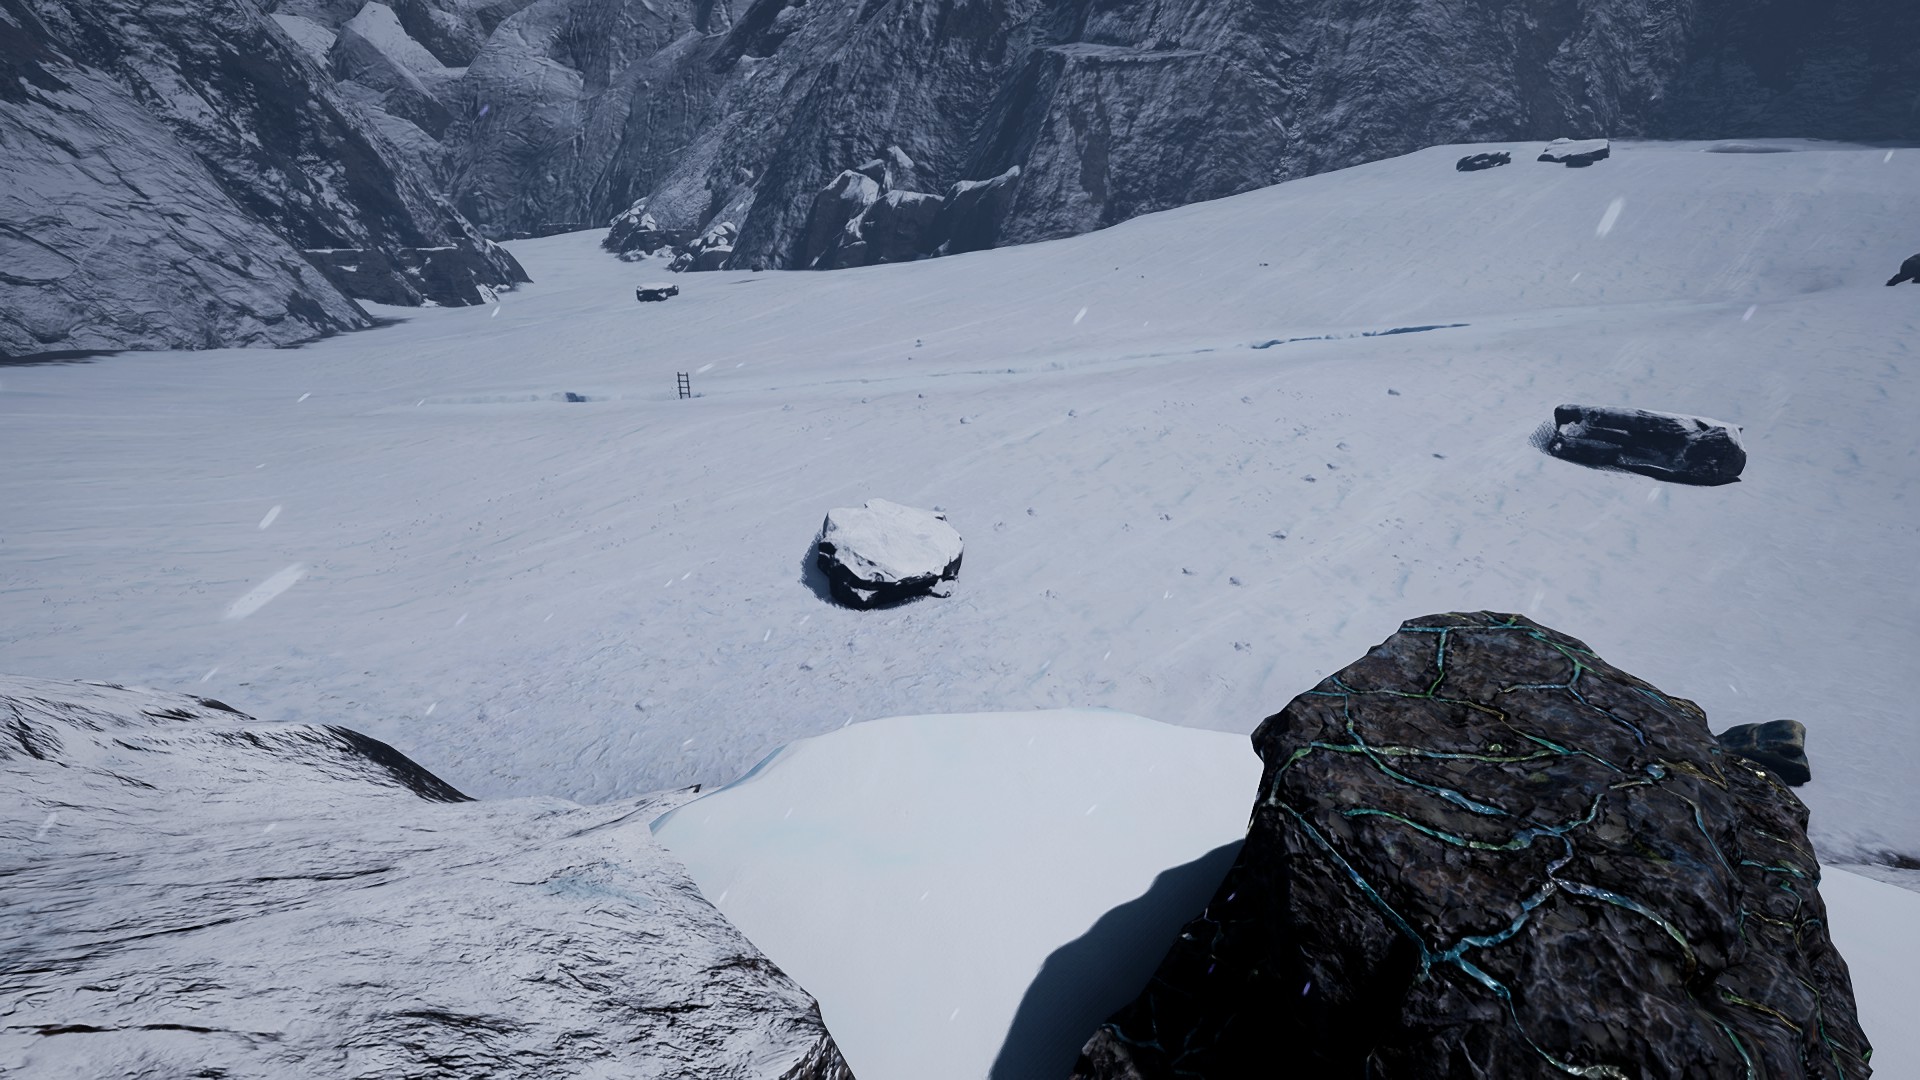
There’s one more node to find, this one on the top of a cliff. It’s in the middle of the very top of O-14 — the ridgeline itself is visible on the map as a darker area. (Thanks to EIP users Sap and Crog for this info, and our very own SurvivalSherpa for the images!).
The map location of the ridgeThe ridge as seen from the southYour Reward (this view faces north)
Now head back the way you came (head north this time), once again being very careful about Polar Bears. Don’t fret if you do end up mauled; as long as you can find where you died, you can retrieve your Exotic Ore. You’ll need to make your way all the way back through the Forest biome, heading north, west, and then south to return to the drop pod. It’s not a bad idea to bring your shelter along and set up a new spawn point about halfway to the dropship.
When you reach the dropship, you’ll need to drag some ore manually (don’t control+click) into the Dropship Cargo, then exit the dropship’s inventory screen. You should then see your final mission objective complete, and shortly see the “Mission Complete” indicator in your objectives on the HUD. Once you’ve confirmed you’ve completed the Mission, make sure you put the rest of your Exotic Ore and any Workshop tools you have in either your hotbar or the Dropship Cargo, and then you can leave the planet!(Thank you to EIP user Neinier for reporting this mission quirk).
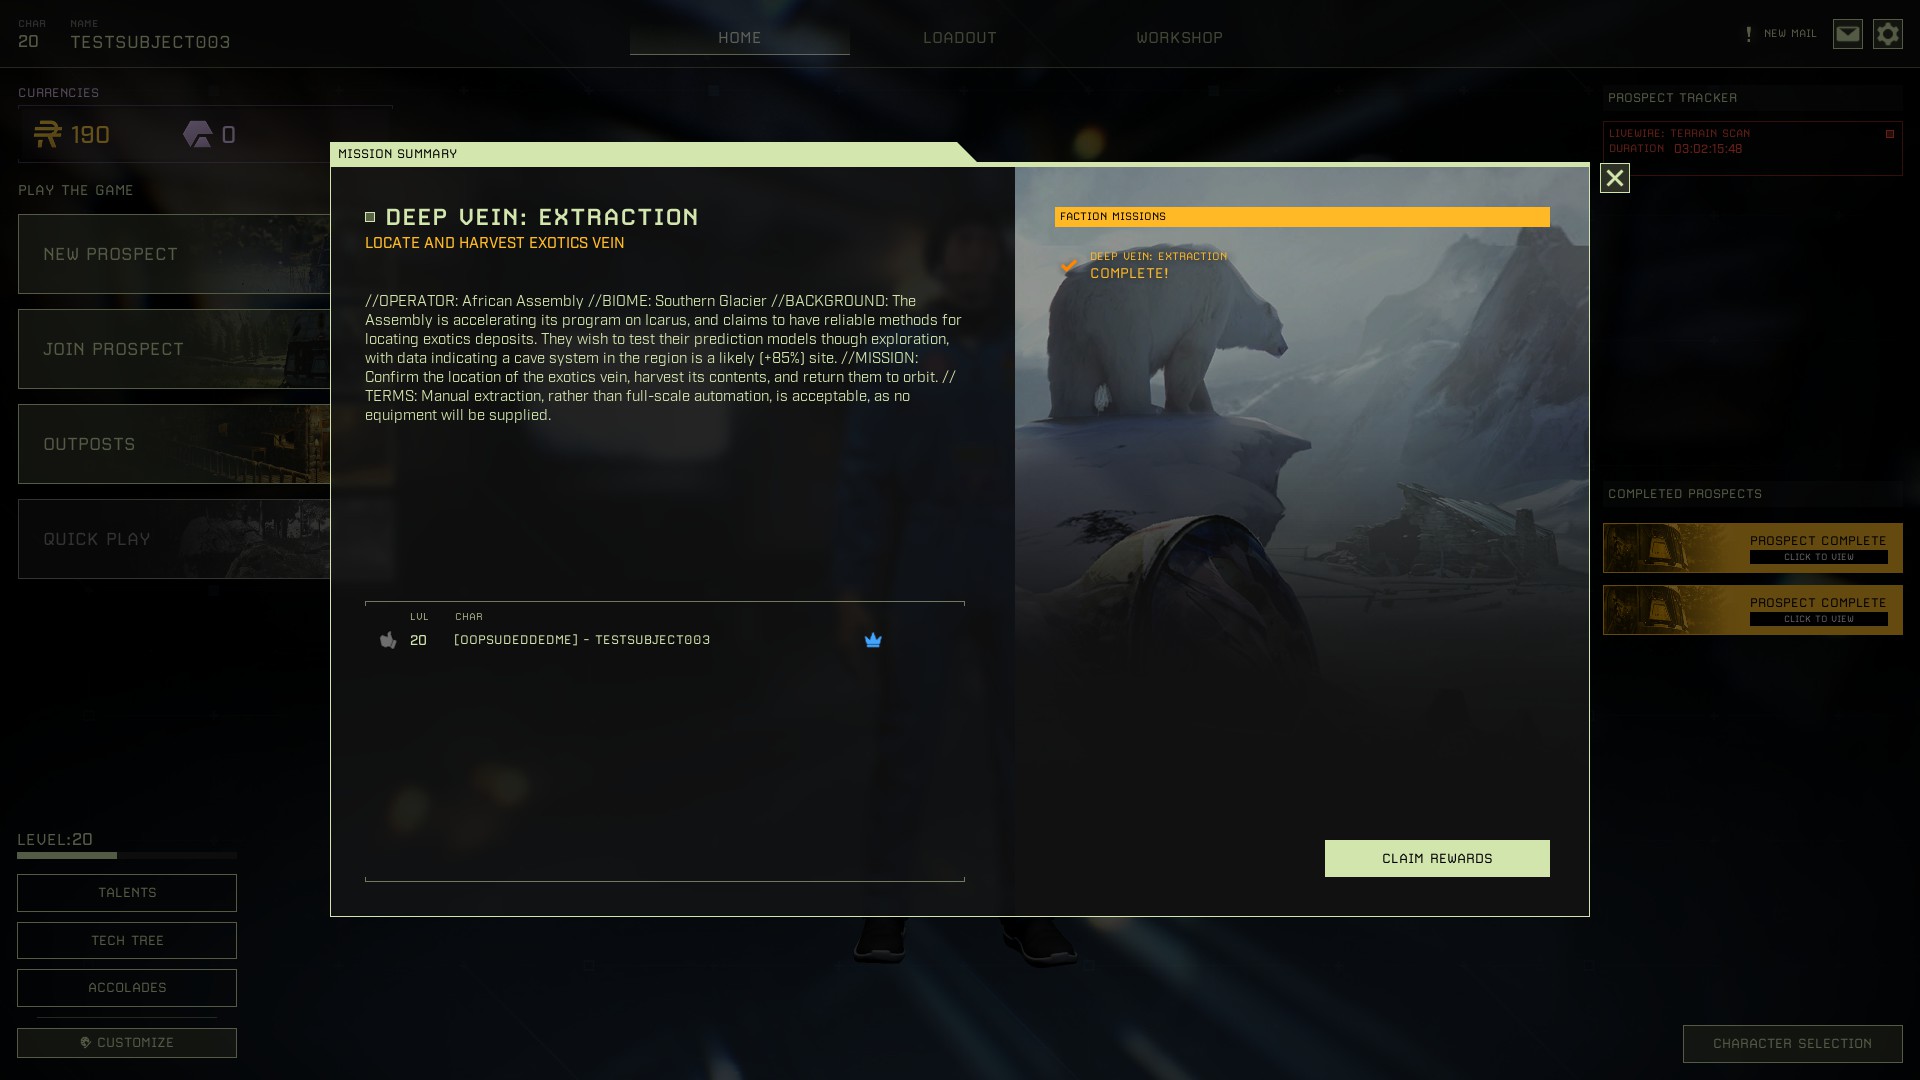
Note that you won’t earn your rewards from this mission automatically. On the Home screen, click the yellow Banner under Completed Prospects and then click Claim Rewards — you’ll then earn your Exotics.
We hope this DEEP VEIN mission guide was helpful! If you have questions or suggestions, or if you managed to find an Exotic node we missed, please let us know in the comments below.
Share this article:
DanielD
Unabashed FromSoftware fanboy still learning to take his time with games (and everything else, really). The time he doesn't spend on games is spent on music, books, or occasionally going outside.