In this guide we’ll show you everything there is to know about the Boneyard, a small city that was built on top of the bombed-out remains of Los Angeles.
Introduction
Here is another optional area that’s great for some extra weapons and ammo (from the Gun Runners), quests and especially to upgrade your Plasma Rifle and Powered Armor. I’d recommend that you wait to come here until finishing the Brotherhood of Steel, as you’re nearly in the end game, if not there already if you have been following the walkthrough. The Boneyard is simply the place to prepare you for the two remaining and required areas of the game, the Military Base and Cathedral.
Its southern and main area is called Adytum, so if you see reference to that name throughout the game, that is essentially the Boneyard inner city. To its north is the Downtown hub, where the Blades (they’re good) gang is. To Downtown’s west is the Library and to its east is the Warehouse (where deathclaws be). To the Warehouse’s east are the Gunrunners.
Boneyard Areas
Adytum: the first place you enter. The Boneyard inner city
Downtown: the hub of the Boneyard and location of the Blades gang
Library: an companion named Katja is stationed here, at the Followers of the Apocalypse
Warehouse: a small area in between Downtown and the Fortress, where deathclaws are
Fortress: home of the Gunrunners, where you can buy nice ammo and weapons
Boneyard Quests
Here is a list of the significant quests in the Boneyard, each with a brief synopsis containing at least one way to solve it. The remaining ways, and possibly other minor quests I will leave up to you.
Raise Your Luck
In a tent on the eastern side of Adytum you’ll find Chuck, the tarot card reader. Save your game, and continue asking for readings until the Fool card comes up. You’ll get a permanent +1 increase to your Luck. It is not necessary to reload your game unless you do something wrong, like make fun of him. You can continue to talk to Chuck and ask again for a tarot reading until the Fool comes up.
Fix the Hydroponic Farms
In southwestern Adytum, find Miles the chemist and speak with him. He’ll ask you to look for the parts needed to fix the hydroponic farms. He’ll then direct you to Sammael, who can be found in a tent just to the east. Sammael will warn you about deathclaws, and he’ll inform you that the last scavenger who went looking for the parts radioed in that he’d found them — but then disappeared.
To track down the parts, you’ll need to go to the Warehouse area, which you can reach by going north from Adytum to Downtown, and then east from Downtown to the Warehouse. The Warehouse has up to 3 deathclaws so be careful. You’ll find the parts (aka Junk) on the corpse of a merchant on the eastern side of the building.
When you have the parts, bring them to Miles. He’ll notice they’re in bad shape, and he’ll send you to Smitty, who has a workshop on the eastern side of the area. Smitty will repair the parts for you. When you deliver the repaired parts of Miles, he’ll reward you with six Stimpaks and 250 caps. But most importantly, Miles and Smitty will now be available to upgrade your gear (see below).
Upgrade Your Equipment
After completing Miles’ quest to fix the hydroponic farms, he and Smitty will offer to upgrade two important pieces of your equipment: your Plasma Rifle and Powered Armor.
To upgrade your Plasma Rifle, you’ll need to talk to Smitty (in his workshop on the eastern side of Adytum). He’ll apply a few “tricks” to it, and you’ll end up with a Turbo Plasma Rifle, which deals 5 more damage, has 10 more range, and requires 1 less AP to fire.
To upgrade your Powered Armor, you’ll need to talk to Miles (outside his mushroom farm in southern Adytum). He’ll tell you that he knows of a way to harden the surface of your armor, but that he’s missing some details about the process. So he’ll send you to Mrs. Stapleton, the librarian at the Hub (Downtown), and ask you to fetch some Chemistry Journals from her. Mrs. Stapleton will charge you 750 caps for the books. There isn’t any way around this. When you hand over the books to Miles, he’ll spend the next 24 hours converting your Powered Armor into Hardened Power Armor, which has better damage resistances and thresholds.
Recruit Katja
On the Library map, west of Downtown, you’ll find appropriately enough, the library. Inside, you’ll meet Katja. Tell her you’re in town briefly yourself and she will join you for 200xp.
Find the Spy
In the basement of the Followers building in the Library map, you’ll meet a “hideous ghoul” named Talius. When you talk to him during the day, you’ll learn that he’s from Vault 13 as well, and received the same quest as you, only fared worse. If you ask him what he’s doing with the Followers, he’ll reveal that he’s looking for a spy from the Children of the Cathedral, and that he suspects it must be a scout. However, this quest was never completed. There isn’t any way to find the spy.
Kill the Deathclaws
You’ll find the Gunrunner Fortress located east of Downtown past the Warehouse. Inside, you’ll meet their leader Gabriel. He’ll tell you that the Gunrunners have been having problems with deathclaws, who keep appearing in the Warehouse area to the west. If you agree to deal with the deathclaws for him, then he’ll allow you to “name your price.” You’ll get up to two options for this — weapons for yourself, or weapons for your friends the Blades, provided you’ve spoken to Razor in the Downtown area — but it won’t make any difference what you say now. You’ll get a chance to change your mind later.
In the Warehouse map, you’ll usually encounter two or three deathclaws on the surface. Deathclaws are tough, but if you have Powered Armor and a good weapon, then you should be able to kill them without too much fuss, especially if you can draw them to you one at a time. But be aware: deathclaws are worth 1000xp, and if you leave the Warehouse map, rest for an hour or more, and return, then the deathclaws will be back — making them an excellent source of xp if you’re trying to build up your character. The deathclaws will stop spawning when you complete this quest, so you might want to kill them for a while before proceeding.
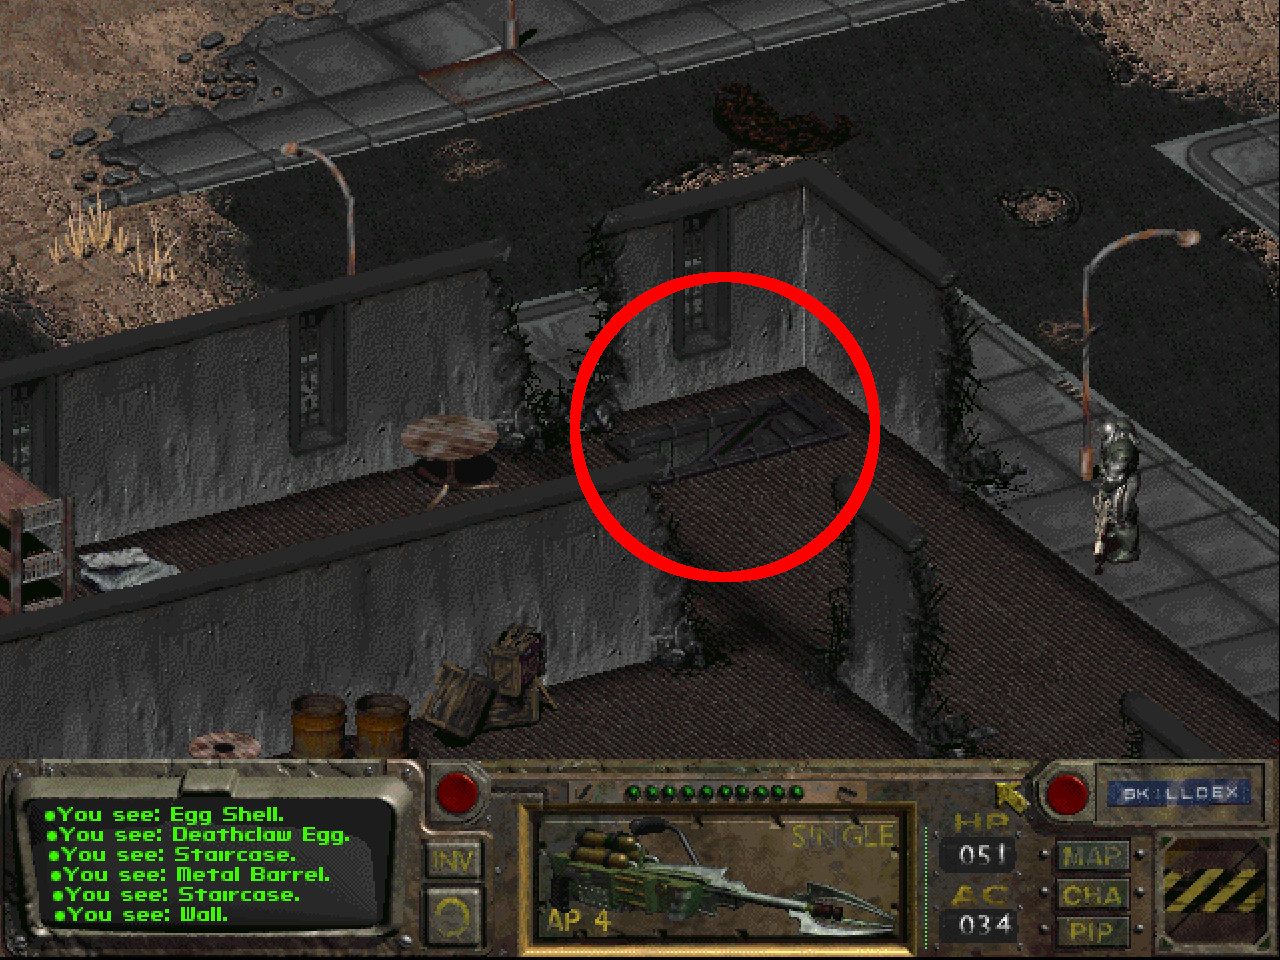
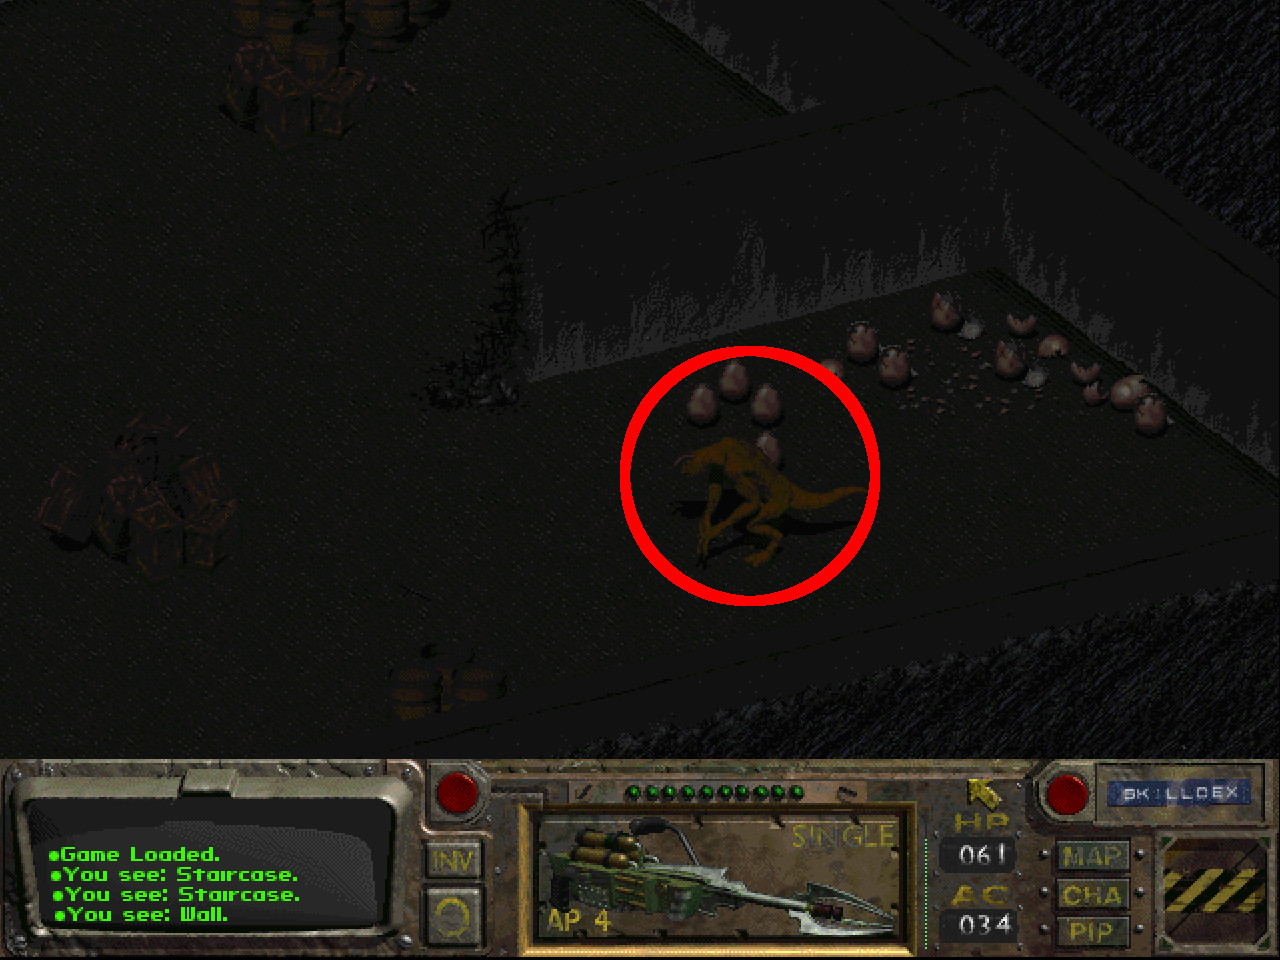
Image 1Image 2The staircase leading down to the mother deathclaw lair (Image 1), and the mother deathclaw and her eggs (Image 2).
To defeat the deathclaws, you’ll have to kill the ones on the surface map, and then you’ll have to descend to the underground level where you’ll discover the mother deathclaw and her nest. The mother deathclaw is tougher than the regular deathclaws, with roughly double the damage thresholds and resistances, and 50% more hit points. Plus, it’ll be dark in her lair, which can hamper your accuracy (so if you collected some Flares earlier in the game and never knew what to do with them, now’s your chance). So only face the mother when you’re prepared. After killing her, be sure to “kill” her eggs as well, which should go down in one hit each. You’ll earn 1500xp for killing the mother and 20 xp total for killing the eggs.
When you return to Gabriel, if he suggests that you wait a few days to see if the deathclaws come back, that means you missed a deathclaw or an egg or somewhere, and you still need to finisjh them off. Otherwise, he’ll congratulate you for a job well done, and he’ll once again ask you what reward you want. This is where you’ll have to make a choice:
If you choose weapons for yourself, then the Gunrunners will move away from the lockers in their Fortress, allowing you to loot them. Inside, you’ll find high-end weapons including a Plasma Rifle, a Power Fist, and a Rocket Launcher, plus some ammunition, explosives, and even some Stimpaks. You’ll also earn 1000xp.
If you choose weapons for your friends the Blades (see their quest below), then the Gunrunners will happily supply them. You’ll also earn 1000xp.
There is an exploit with the reward. If you choose the weapons for yourself and then leave the Fortress and come back, then when you talk to Gabriel again, he’ll allow you to pick a reward again. This will happen until you eventually select weapons for the Blades. You won’t receive any extra equipment from the Gunrunners by repeatedly choosing weapons for yourself, but you will earn 1000xp each time, plus another 1000xp when you select the Blades reward.
Along with the reward from Gabriel, you’ll also receive a reward from Zack, the shopkeeper in the Fortress. He’ll give you a 20% discount. Zach is the best weapons merchant in the game, and like Jacob in the Hub, he’ll re-supply his caps every time you talk to him. So the discount can be very helpful.
The Regulators vs. the Blades
You’ll meet Jon Zimmerman, the mayor of Adytum, in a building on the western side. He’ll ask you to deal with a “ruthless and bloodthirsty” gang called the Blades, who constantly harass Adytum — and who killed his son, Josh. In particular, he’ll want you to kill their leader, known as Razor.
Head north to the Downtown area, enter the Blades building, and you’ll find Razor in the southeastern room. Instead of killing her, give her a chance to talk. If you tell her that Zimmerman sent you, and that he wants revenge for the Blades killing his son, then she’ll vehemently deny the accusation. She’ll reveal that the Regulators are lying to Zimmerman to control him, and that they’re the ones who killed Josh when he tried to sneak into town and tell his father what they’re doing. For proof, she’ll give you the holodisk Regulator Transmission, but she’ll suggest that nothing will change unless you arm the Blades with weapons from the Gunrunners.
At this point you’ll have three ways to complete the quest:
You can kill Razor. This will cause all of the Blades to attack you, but since they’re not well equipped, defeating them shouldn’t be difficult. When you return to Zimmerman afterwards, he’ll pay you 2000 caps. If you tell him that you made Razor suffer, then he’ll throw in an extra 500 caps. However, completing the quest this way will cause the Gunrunners to turn against you, and while they’ll drop lots of high end weapons and ammunition, you’ll lose Zach, the best merchant in the game.
Note: If you killed Razor after accepting the holodisk from her, then you’ll need to drop the holodisk before talking to Zimmerman, or else you’ll only be able to tell him about the holodisk, and not Razor’s death.
You can take Razor’s holodisk to Zimmerman. Zimmerman will be outraged, but before he can do anything, he’ll get gunned down by the Regulator in the room with him. You’ll then have to fight all of the Regulators in Adytum. The Regulators are much better equipped than the Blades, but if you’ve picked up Powered Armor and some high-end weaponry, then they probably won’t pose much of a challenge — for you, at least. Your companions (if any) might have more of a problem. After dealing with the Regulators, when you return to Razor, you’ll receive 500xp.
Note: If all you can do is tell Razor that Zimmerman is dead, that means you missed one or more Regulators.
You can go see the Gunrunners. You’ll find them in their Fortress, which is east of Downtown past the Warehouse. After completing their quest to kill the deathclaws, they’ll agree to supply the Blades with weapons. When you return to Razor with the good news, she’ll ask you to help the Blades take out the Regulators. You’ll then travel to the Adytum map, where it’ll be you, the Blades (now sporting Combat Armor and energy weapons), and the Adytum citizens against the Regulators. This can be a messy battle. Zimmerman will almost certainly die, and lots of Adytowners — including Myles and Smitty — can get killed as well. So to be safe, upgrade your equipment before starting the battle. When all of the Regulators are dead, you’ll earn 2000xp, and Razor will show up near the entrance to the map to thank you for your help.
If you complete this quest by helping the Blades, then afterwards you can visit with MacRae in front of the Blades base in Downtown. He’ll offer to train you in melee combat, but this part of the game is broken, and you won’t actually receive any combat bonuses.