This guide will help you navigate the first level of the Crimson Tower in Eye of the Beholder II.
Crimson Tower Level 1 Map
Area Overview
Notes
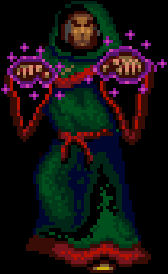
The mages on this level have access to all of the available mage spells, including Fireball, Hold Person, and Ice Storm, so they’re no joke to deal with. But they’re real mages with low hit points, so try to kill them quickly before they can spam you with too much damage.
You’ll need three Fire Spheres at the end of the level (#23), so make sure you create enough when you have a chance (#4).
The invisible teleporter here (#1) will send you to the north (#1a). You can turn off the teleporter by pulling a lever (#1b).
2 – Teleporter
The invisible teleporter here (#2) will send you to the north (#2a). You can turn off the teleporter by pulling a lever (#2b).
3 – Teleporter
The invisible teleporter here (#3) will send you to the north (#3a). You can turn off the teleporter by pulling a lever (#2b).
4 – Shelf / Fire Sphere / Crimson Ring
If you place an item into the shelf here, then you’ll receive a Fire Sphere in its place. You can do this as many times as you’d like, but be aware: you’ll need at least three Fire Spheres in the final part of the level (#23). A mage will also start at this location before wandering around the area. He’ll drop a Crimson Ring when he dies. If necessary, more mages will spawn here as well if you need more Crimson Rings. You’ll need two Crimson Rings to cross the hallway in the southern part of the level (#8).
5 – Regal Banner / Crimson Ring
When you click on the banner here, a Crimson Ring will fall to the ground.
6 – Mage Ambush
Each time you step here, mages will appear in front of you and behind you. So be ready for a fight. Or you can use the nearby teleporters to avoid this square.
7 – Sticky Paper
You’ll find some Sticky Paper on the ground here. It’s cursed, so if you equip it, then you won’t be able to remove it without a Remove Curse spell. You’ll need the paper in the slippery hallway to the east (#9).
8 – Circular Carvings
On both sides of the wall here, you’ll find a circular carving. If you place a Crimson Ring (#4, #5, #9) into it, then the wall will collapse into itself, creating a void. If you step into the void, then you’ll cross through the wall to the other side. If you don’t step into the void, then the wall will return to normal. But either way, you’ll lose the Crimson Ring.
9 – Slippery Hallway / Crimson Rings
You’ll find two Crimson Rings and a Mage Scroll of Fear in the hallway here, but when you try to approach them, they’ll keep skittering away. To keep the items in place, you’ll need to drop the Sticky Paper (#7) anywhere in the hallway. Then when the items get to the paper, they’ll stop moving.
10 – Robe / Coin
You’ll find a Robe of Protection +2 and a coin called “Shall Rejoice” on the ground here. You’ll need this coin later in the level (#17).
11 – Armor
You’ll find Plate Mail +3 on the ground here.
12 – Coin
You’ll find a coin called “Majap” on the ground here. You’ll need this coin later in the level (#17).
13 – Pressure Plates
Each time you step onto one of these six pressure plates, several nearby walls will turn on or off, changing the layout of the area. There is a fixed pattern to this — each of the pressure plates will toggle four of the thirteen moveable walls — but it’s easier to just wander around randomly until you create a path to the two important locations where you can gain a Coin (#15, #17), plus the staircase that will take you to the next part of the level (Exit J).
14 – Green Force Field
The only way to remove this force field is to cast Disintegrate on it.
15 – Insal the Quick / Coin
When you step here, you’ll discover Insal the Quick (whom you might remember from the Catacombs, Level 1) hanging from a wall in the alcove to the east. He’ll apologize for robbing you (even if he didn’t), and he’ll toss you a Coin. Then a moveable wall will replace the alcove with Insal, blocking your access to him. There isn’t any way to rescue Insal.
You’ll need at least one Coin in a later pat of the level (#20), but you can get another Coin elsewhere (#17), so if you can’t reach Insal because of the force field (#14), it’s not a problem.
16 – Shrunken Giant
When you step here, you’ll spot a “shrunken giant” in the alcove to the north. He’ll insult Dran, and he’ll try to warn you about something — only he’ll get turned to stone before he can finish, and you won’t learn his secret. Then the alcove with the giant will get replaced by a moveable wall, so you won’t be able to cure him.
17 – Tree Giant / Coin
When you step here, you’ll discover a strange half giant, half tree in the alcove to the west. If you let the giant touch you, then he’ll search your party. If he finds the two coins from earlier in the level (#10, #12), then he’ll take them from you and give you a Coin in return. Then a moveable wall will replace the giant’s alcove, preventing you from interacting with him further. You’ll need the Coin in a later part of the level (#20).
18 – Mages
Somewhere around here, you’ll encounter a pair of mages. One of them will drop Bracers of Protection (+0) when he dies.
19 – Invisible Teleporter
When you step here (#19), you’ll get teleported to the north (#19a). You’ll have to use the nearby illusionary wall to avoid this trap.
20 – Locked Doors
You’ll need Coins (#15, #17) to open these doors.
21 – Mages
In each of these rooms, you’ll encounter a pair of mages. They’ll open doors and attack you when you get close to them, so be ready. Between the three pairs, you’ll always find two Bracers of Protection (+0) and a Ring of Protection +1 (that won’t stack with your body armor). The easiest way to deal with the mages is to retreat back to the previous room, and then dance around them to avoid their spells.
22 – Red Spinners
At these two locations, you’ll find a red spinner with a notch on one side. If you rotate the spinners so they’re both pointing up, both pointing to the right, and both pointing down, then you’ll remove three green force fields (#23) and three moveable walls (#24) to the east.
23 – Green Force Fields / Sphere Holders
To remove the green force fields at these locations, you’ll either need to cast Disintegrate on them, or you’ll need to use the red spinners to the west (#22). You’ll find sphere holders behind the force fields. If you place a Fire Sphere into each one, then you’ll remove the moveable wall blocking the level exit (Exit M). You can get more Fire Spheres from a shelf at the start of the level (#4).
One-way teleporter to #7. After using this teleporter, it will disappear, granting you access to the alcove to the east.
One-way teleporter to #7.
One-way teleporter to F1.
One-way teleporter to G1.
One-way teleporter to H1.
Stairs.
Stairs.
Stairs.
Stairs.
One-way level exit. Once you’ve removed the wall blocking this spot (see #23 for details), you’ll just need to pull the handle on the western wall here to get sucked into the Crimson Tower (Level 2).
Share this article:
Val Hull
Resident role-playing RPG game expert. Knows where trolls and paladins come from. You must fight for your right to gather your party before venturing forth.